Mehdi Sadaghdar, better known as ElectroBOOM, created a name for himself with shocking content on YouTube full of explosive antics.But once you get past the meme-worthy shenanigans, he is a genuinely smart guy that provides useful and accessible lessons on many electrical engineering principles.If you like your learning with a dash of over-the-top entertainment, he’s your guy.
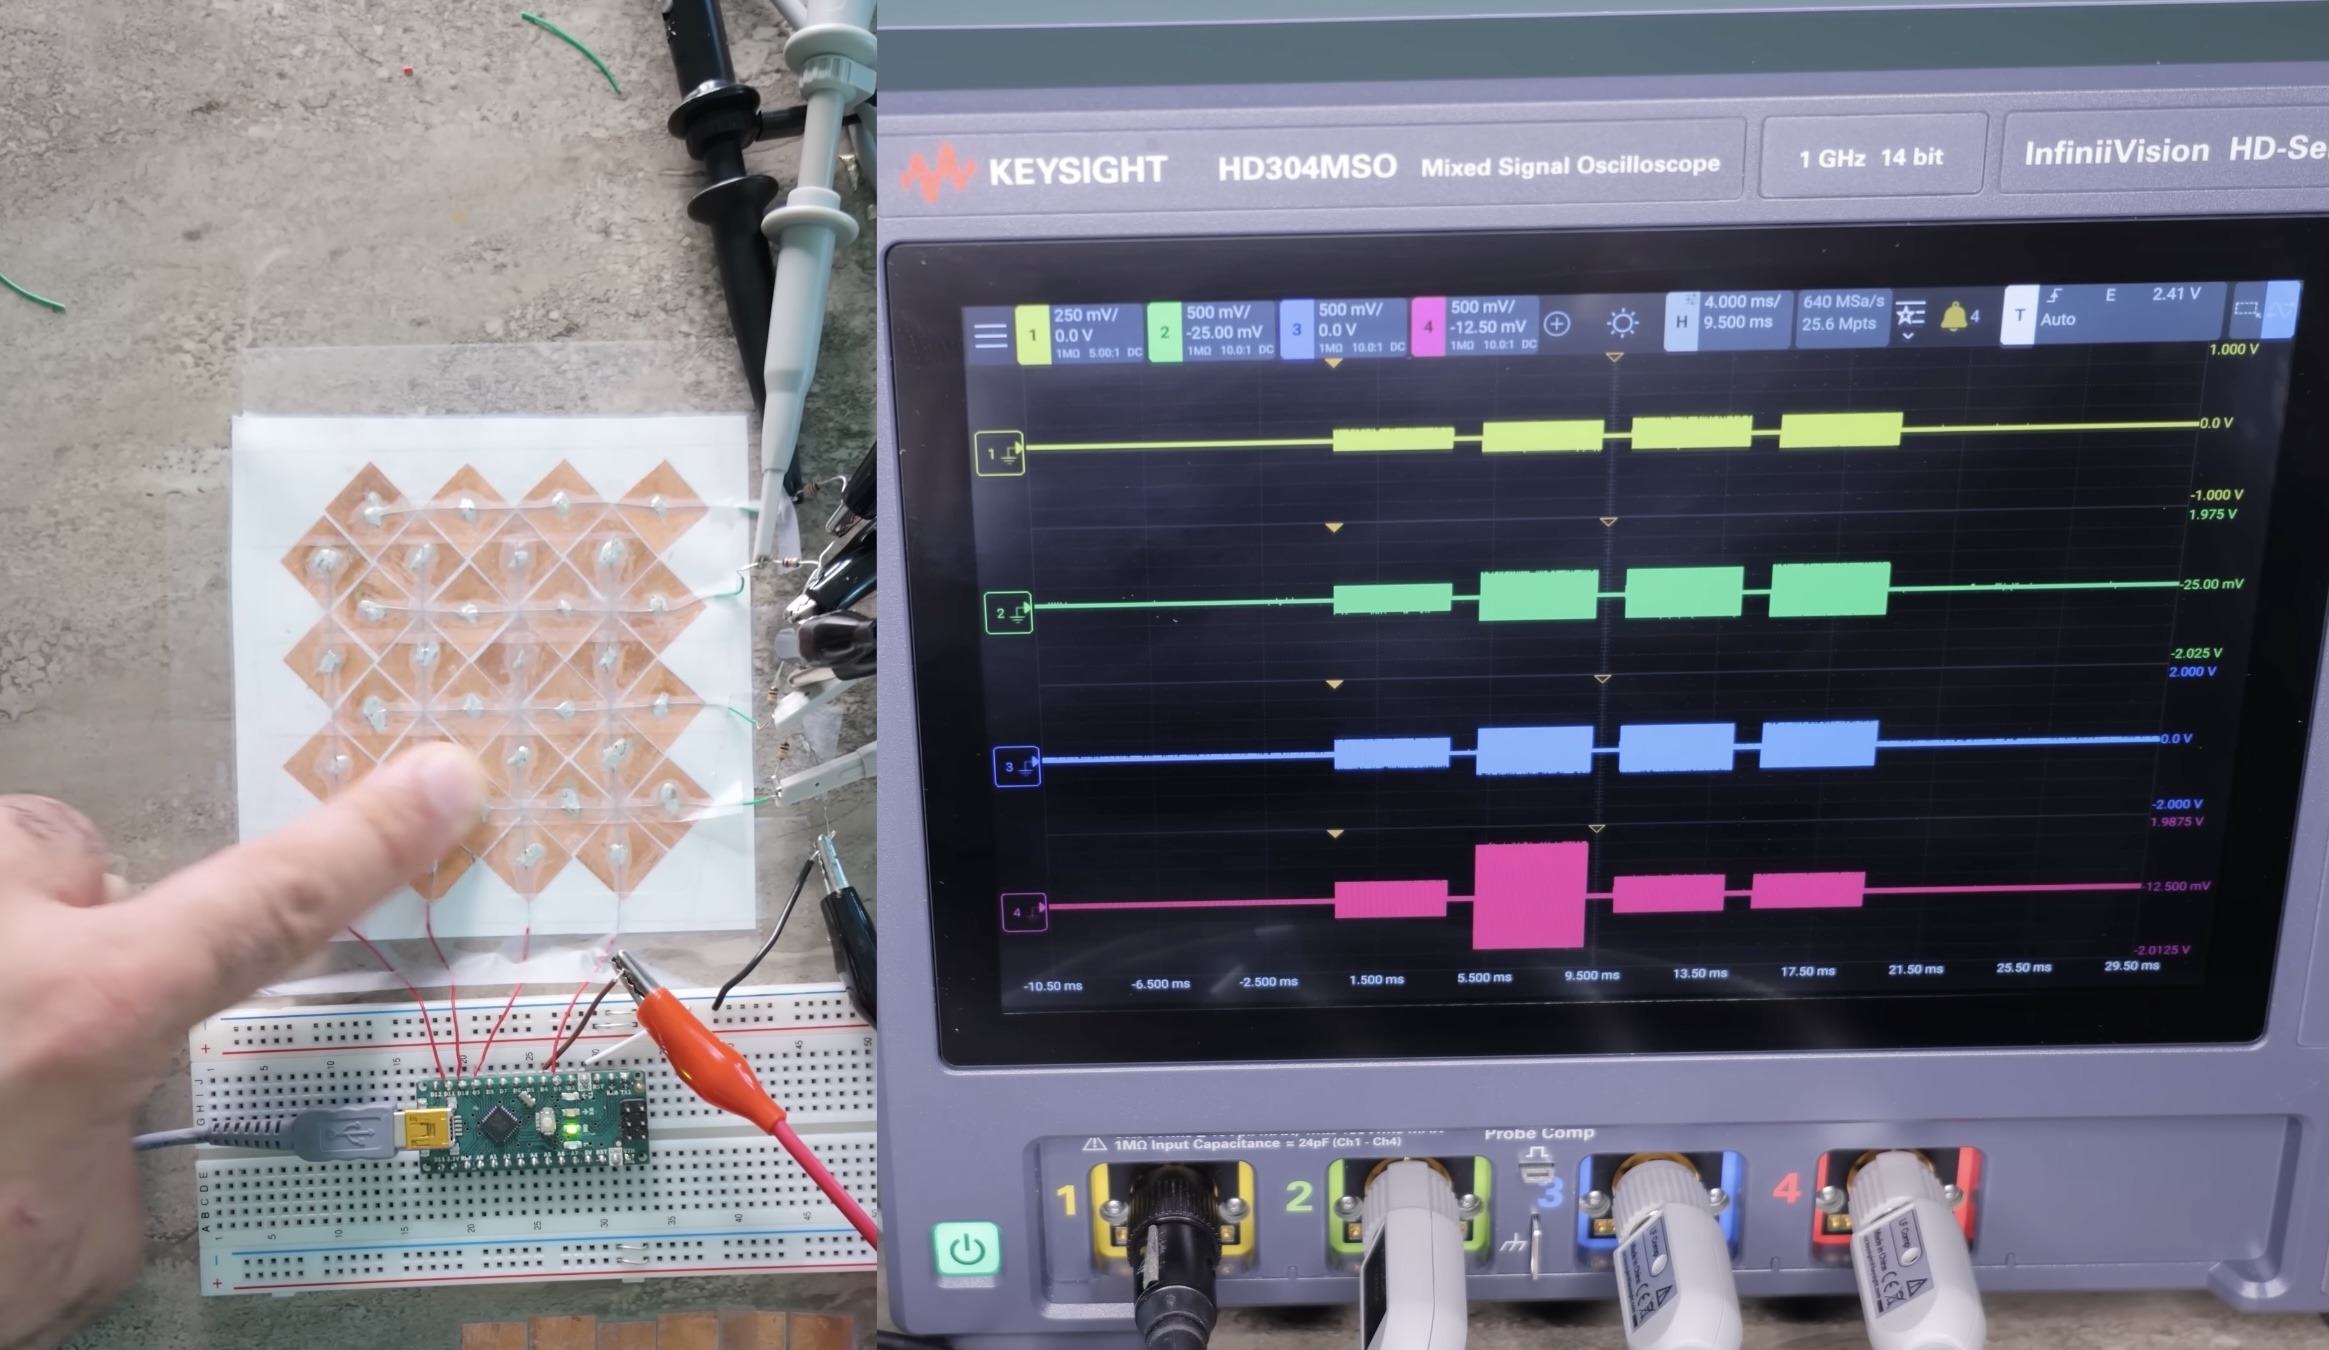
And in his most recent video, he explained how touchscreens work by building a 2D capacitive touch sensor.There are multiple touchscreen technologies in use today and Sadaghdar explains three of them in the video: infrared grid (often called “infrared touch frame”), resistive, and capacitive.But capacitive touch is the standard these days, as it is the most convenient and versatile.
As the name suggests, capacitive touch sensors work by detecting changes in the capacitance between electrodes.Your fingers alter that by a measurable amount, so it is simple enough to register a touch across a single driver/receive electrode pair.From there, you can add many of those pairs and arrange them in a grid of rows and columns, similar to a keyboard matrix.
The more electrodes you can stuff into a touchscreen, the higher the precision.But because fingertips are pretty big, there isn’t much sense in having a massive number.The value in Sadaghdar’s content, other than the zany hijinks, is in how he conveys those concepts in an understandable way.
To hammer the point home, he made a simple 2D capacitive touch sensor that is like a low-resolution version of what you might find in a smartphone.He built it using just an Arduino Nano board and some copper tape on a piece of paper.If you want to integrate a custom capacitive touch sensor into your next project, watching the video is a great way to get a grasp of the fundamentals.