If you’re building a homelab, the price can quickly add up.Though there are bargains to be had in the form of second-hand mini PCs and salvaged drives, if you have a 3D printer you can save even more money by making your own components where possible.Here are five ideas to get you started this weekend.
A modular rack Room to grow Close Not everyone a server rack, but most homelabbers eventually one.There’s something to be said for keeping all of your hardware in one place, with short cable runs between components and a clean-looking box of tricks whirring away in the corner.Rather than buying new or salvaging something that’s way too big for home, why not 3D print something instead? 10-inch server racks are perfect for most home users, and 3D-printed modular designs allow you to expand your rack as you add more components or modify a design to suit.
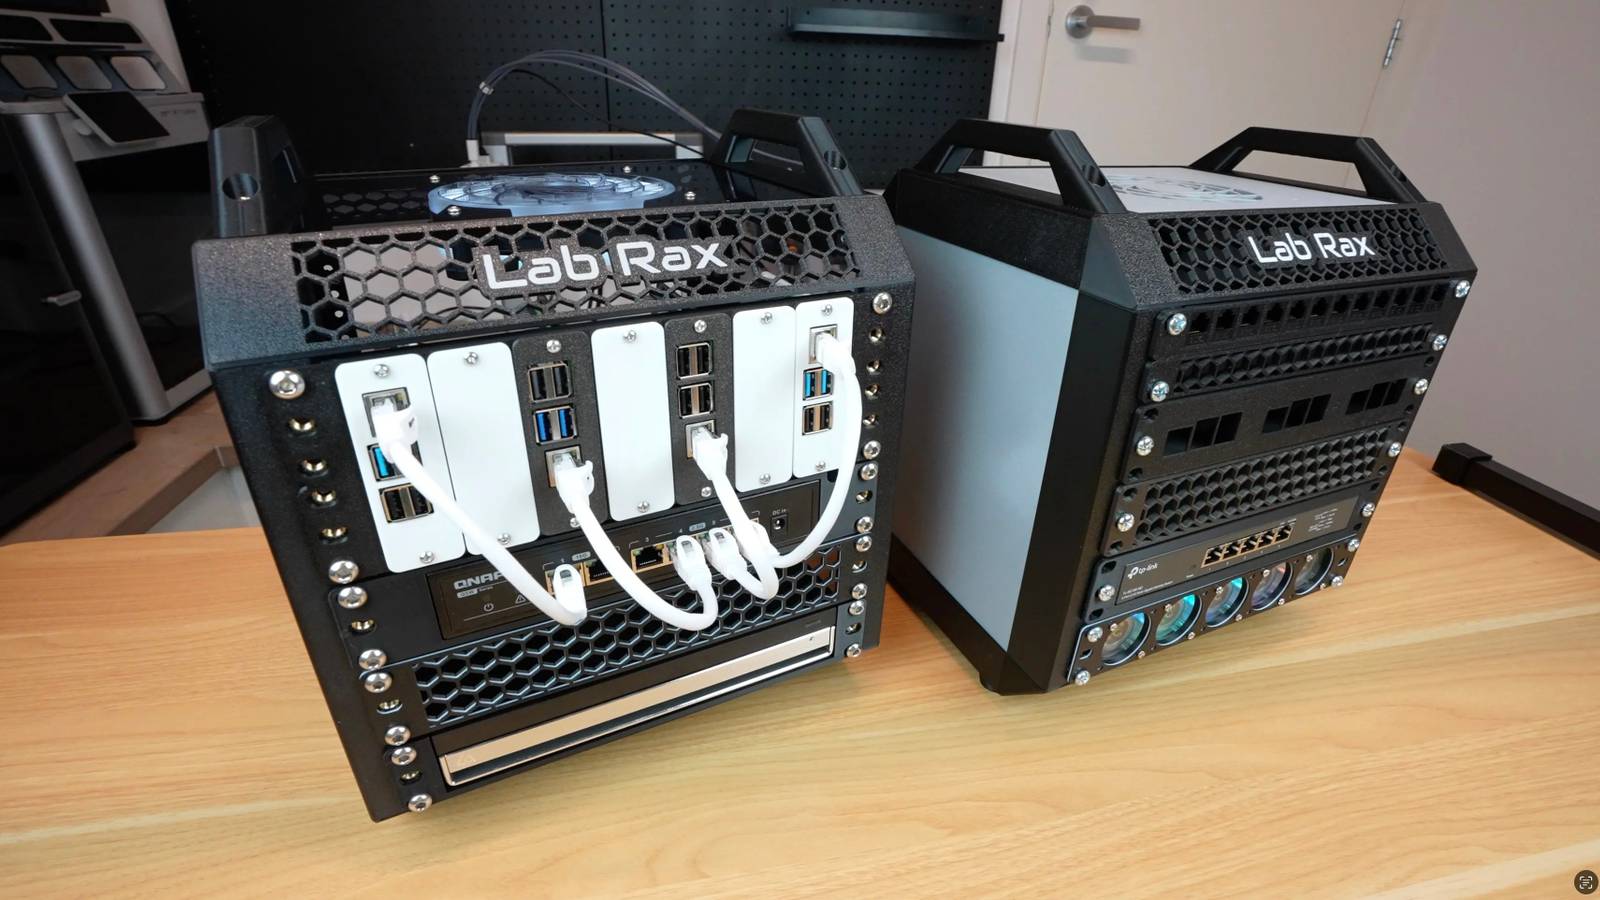
The Lab Rax is among the most popular 3D-printed homelab racks for a reason.With a 5U setup and 10-inch size, the rack requires just a few screws and brass inserts to complete.One of the main reasons to choose it is the vast number of official panels, mounts, and variations there are; while the community has also taken the liberty of designing its own add-ons.
The Modular 10” Server Rack is another popular option, with reviewers praising how sturdy the finished project is.You can add optional top and bottom covers, or you can just keep printing extra bits and stacking them on top of one another.If you want a more heavy-duty design, the KWS Rack uses more filament but maintains modular simplicity for an expanding server setup.
Lastly, if you want to keep things compact, the Microlab is a modular rack system that’s only five inches wide and is designed specifically for smaller components like the Raspberry Pi, Intel NUC, and other pint-sized PCs and network hardware.Rack mounts for everything Print a rack then print some mounts The rack is just one part of the homelab equation.Once you have a design you’re happy with, it’s time to start mounting things.
These allow you to securely fasten homelab equipment like servers, routers, switches, smart home hubs, and pretty much anything else you can think of to your rack.What you print depends on the size of your rack, but for smaller 10-inch variants, there are parametric rack mounts that you can customize to fit pretty much anything you like.Beyond this, you’ll find purpose-built mounts for everything from Raspberry Pi single-board computers to hard drive mounts and hardware-specific mounts for popular homelab choices like the Dell Optiplex Micro.
While you’re at it, why not print some rack mounts with drawers so that you can store tools, cables, and other equipment close? There are even printable labels for your homelab that you can fasten to the same screws used to mount your hardware.Print your own NAS Spend your money on hardware, not cases A network-attached storage (NAS) drive is a compelling reason to start building a homelab, and there are two routes you can take.The first is the more expensive, turnkey solution of buying a ready-to-go enclosure that includes the hardware you need and the mounting points.
You just slap in some hard drives, and you’re off to the races.The other way of doing it is to build your own NAS and use an operating system like TrueNAS, Unraid, or OpenMediaVault.This allows you to repurpose or hand-pick your hardware, with the caveat that you’ll have to find some way to house everything.
Often, this involves repurposing a chunky old PC case, but a 3D-printed enclosure is a far more elegant solution.Take the Modcase MASS for example, which is available in both free and premium designs.The free version supports four 3.5-inch and three 2.5-inch bays, while the premium offering ups this to 10 3.5-inch bays.
The stackable design means you can keep printing them to expand your pool.Other projects like Pearity look a lot more like the commercial options from Synology and the like, offering eight bays and compatibility with 10-inch server racks.Other similar solutions include the eight-bay mini ITX NAS, a design built around Lenovo’s 1L form factor called the TiNAS, and a popular Raspberry Pi-powered NAS design.
Proper cable management Don’t ruin your rack with messy cables Fumbling the ball by failing to properly manage cables is a mistake that can turn a tidy setup into a mess.Homelabs typically have a lot of cables to deal with, starting with power.Personally, I’m a big fan of 3D-printed power strip holders for mounting power points to desks and other surfaces.
Cable combs are another useful tool in the arsenal for keeping cables in order and preventing tangles.This stackable comb design lets you keep things tidy and access cable runs by simply uncoupling the front comb.You can take the strain off Ethernet cables and more using spring cable protectors.
If you don’t mind having your cables out on display, you can also print a cable hanger.Fan controller for your server rack Keep it cool As your homelab grows, more heat will be generated.At some point, you might want to think about properly cooling your server rack, and that’s where a project like the ESP32 Wi-Fi fan controller comes in.
This is a small ESPHome-powered control board that costs $36 and allows you to set rules to govern ventilation, automate cooling, or control it via the web interface.Of course there’s a free 3D-printable case for it.OpenFAN is another similar project that’s worth looking at.
Looking for more 3D-printed upgrades for other parts of your house? Check out projects for your garage, kitchen, and bedroom too.
Read More