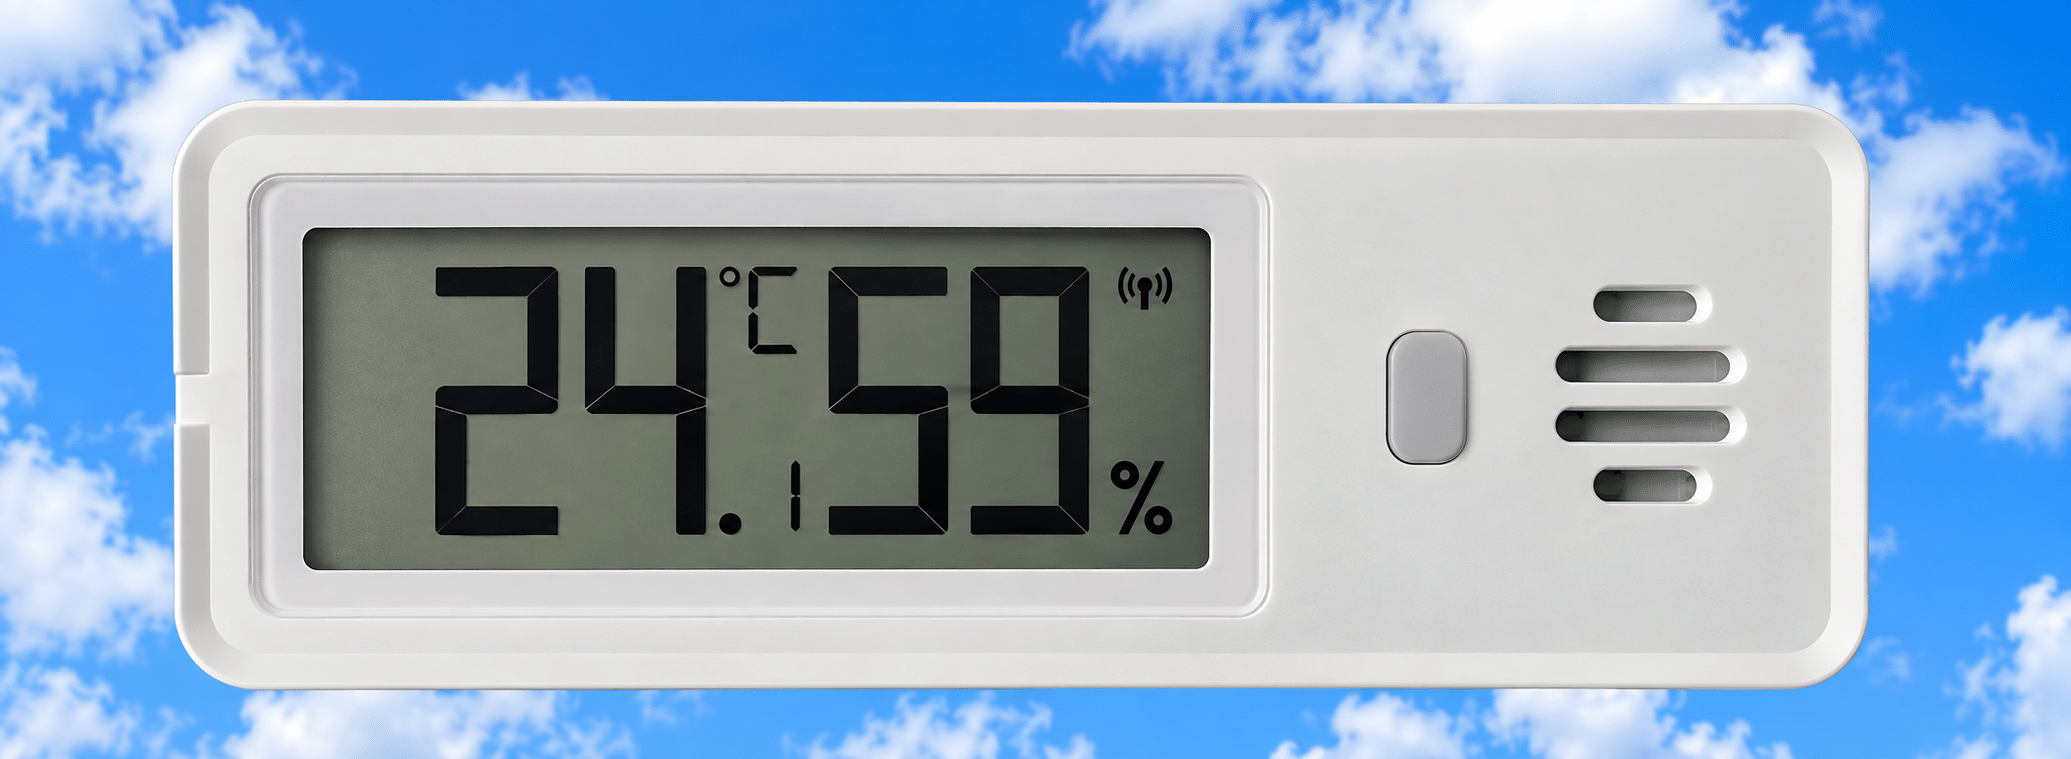
Several new Meross devices landed on my desk today – here are two of them – firstly the Meross MS120 Smart Multi-Function Hygrometer and Thermometer.Before you start thinking… no I don’t take commission and I’m not in any scheme – people just send me stuff to play with – no guarantees Meross MS120 Smart Multi-Function Hygrometer and Thermometer I opened the box, horrified to find no battery in the easily opened unit – only to discover the CR123a battery was in a separate little box – good job as they are not cheap.In the box – instructions – the device, battery and puck for opening to insert the battery – I didn’t need the puck (fingernails do just fine).
Ok, so it’s a Bluetooth BLE device – not WiFi, not Zigbee.That always worries me.Off I went to the Meross app – added the device (which – as I had my phone Bluetooth turned on – it found easily).
No QR code as you often see on IOT devices today.Dead easy setup – and in the Meross app you see the sensors it provides.And there’s more – add “Dew Point Temperature” and “Vapor Pressure Deficit” to the list on the left.
There are various alert conditions, button settings and sound settings – YES that is a potentially loud, configurable speaker on the right of the unit.All very good but what if your phone isn’t within Bluetooth range of the unit – well, as it stands – you’re stuffed.You can of course purchase the new Meross hub – but if you only have the one such unit, that’s awfully overkill.
I wondered if Home Assistant could help.Initially I found nothing as I only have (had) the Meross LAN integration.ChatGPT to the rescue: The Meross MS120 connects to Home Assistant using Bluetooth, not Zigbee or Wi-Fi.
The good news is that there’s now an official Meross integration for Home Assistant which supports its temperature and humidity readings.Step 1 — Install the Meross integration The official integration is available through HACS as a custom repository.1.
Open HACS In Home Assistant, go to HACS → Integrations.2.Add the custom repository Open the three-dot menu, select Custom repositories, and enter: Set the category to Integration, then add it.
3.Install and restart Search HACS for Meross, install the integration, and restart Home Assistant.These steps follow the official project’s installation instructions.
Step 2 — Add the MS120 After Home Assistant has restarted: Go to Settings → Devices & services.Select Add integration.Search for Meross.
Select the MS120 model when prompted.Keep the sensor close to your Home Assistant Bluetooth receiver during discovery and follow the prompts.The integration should create sensor entities for temperature and relative humidity.
Step 3 — Check Bluetooth connectivity Your Intel mini PC needs Bluetooth reception.If it doesn’t have a suitable Bluetooth adapter, you can use an ESPHome Bluetooth proxy instead.You already have experience with ESPHome Bluetooth proxy projects, so you may be able to use an existing proxy if it’s within range of the MS120.
The sensor and proxy need to be close enough to receive its Bluetooth broadcasts reliably.It did – and it works – THAT was easy – and yes I turned off my phone to prove the point -the only thing left in my office that was remotely Bluetooth/BLE was one of my little BLE proxies which I built for Home Assistant some weeks ago (blogged in here and I’ve included in here new code for a very simple BLE PROXY).The original proxy/scanner I put together has proven it’s worth as the Meross appeared by name as well as MAC on the device – of course the absolute minimum proxy would have worked just as well but obviously no display on the smallest unit.
Don;t need the scanner now I know the device is being picked up – and well done to Meross for ensuring it’s BLE device has a name as well as a MAC address.Most devices I’ve spotted with my scanner do not – so you have to do a lot of turning things on and off to find out what’s what.Not, it seems, with Meross.
My Home Assistant is at the other end of a corridor and my office is pretty much a wireless-free zone apart from my WiFi router who’s Ethernet output feeds my PC and who’s WiFi output feeds my phone.Yet folowing ChatGPT’s instructions in blue above – no problem.Ok, right now I’m only seeing sensors, not controls in HA but that’s not unusual shortly after adding something new.
I’ll give you the Meross specs – but note: I only stand by my own testing – not manufacturers claims – I’ll draw your attention to the 3 year battery life claim below – I don’t think I’ve EVER had such a sensor get 3 years out of the battery – though this is a CR123A – slightly larger than you get with similar devices from other companies: Multi-Metric Environmental Monitoring: Go beyond temperature and humidity with Temperature, Humidity, Dew Point, Absolute Humidity, and VPD readings.The 1.9-inch display puts key data at a glance, with up to ±0.2°C (±0.36°F) temperature accuracy and ±2% RH humidity accuracy for a clearer view of environmental changes.IP66 Protection for Indoor & Outdoor Monitoring: Built with IP66 Water and dust resistance and UV protection, the sensor operates reliably from -20°C to 60°C (-4°F to 140°F).
Monitor temperature and humidity in greenhouses, garages, storage areas, and more.Compact & Portable, Monitor Anywhere: Designed with a compact, portable body and an easy-to-read display, the sensor lets you check temperature, humidity, and other environmental data at a glance.Connect to your phone via Bluetooth to track temperature changes, making it ideal for camping, travel, outdoor storage, and more.
3 Years of Battery Life & Instant Alerts: Powered by a CR123A battery, the sensor delivers up to 3 years of battery life.Built-in buzzer and App notifications alert you when temperature or humidity reaches your set conditions, so you can stay informed wherever you are.Long-Term Data Tracking & Export: Automatically record environmental data, view trends in the App, and export data for further analysis.
Store up to 120 days of data locally and up to 2 years in the cloud to easily track environmental changes over time.Smart Automation Based on Environmental Changes: Connect the sensor to other smart devices through the Meross Hub and trigger automations based on temperature or humidity changes.For example, turn on a humidifier when humidity drops or close shades when temperatures rise.
And Now – the MS700 Smart Multi-Function Button The MS700 is the second item in the pack that recently arrived for me.Having gone through the whole Meross app setup only to discover I could feed the device straight into Home Assistant with nothing more than a simple BLE proxy device , I thought THIS time I’d skip the Meross app entirely and at the same time verify that my ESP23-C3-based BLE proxy actually works a it should.So, BLE proxy running in my office – pretty much isolated from the rest of the house (apart from WiFi – the room has it’s own router as signals can’t get through cavehome walls).
Using the above-mentioned Meross HA integration, I told it to add a device – the MS700 – found instantly and added to HA.Here is thew new device info in HA (image on the left).I kept toggling the display (top left button) on the MS700 to ensuer that temperature and humidity displayed on the unit were being updated if I breathed on it – and watching the HA device information (left) – which was indeed updating in sync with the MS700.
That’s half the battle – I’ve yet to figure out what the buttons do – and that means chickening out and reading the manual But first – I’m making assumptions about your knowledge and about the operation of my not-until-today PROPERLY tested BLE proxy.Let’s address all of that now.With the BLE Proxy (see photo at the end of this article) plugged into USB and my phone (the only other device (I hoped) in the room – turned OFF – I managed to add the MS700 into Home Assistant (which is at the far end of the house) via my PC Chrome browser.
Good start – but how could I prove that this Bluetooth-based MS700 was actually using the little proxy to talk to HA? Simple – keep breathing and note the temperature in the HA MS700 “device screen” changing regularly – then without changing anything else – pull the USB power from the proxy.THAT WORKED – no more change of readings – the temperature and humidity readings on the screen above FROZE.I kept watching the device and the HA device screen and breathing for a couple of minutes – no change on the HA screen despite regular updates on the MS700 itself.
THEN I re-applied USB power to the proxy and seconds later – the HA screen started updating again – you can’t get more conclusive than that.The only assumption I’m still making is that you follow BLE Proxy.Not too long ago I didn’t have a clue what that meant.
Well, it turns out that almost but not quite all ESP32 devices can with the right firmware, act as BLE proxies – bridging Home Assistant and a BLE device like the MS 700 or MS120.In this case the bare minimum, cheapest possible ESP32 board has the job.Depending on how much your government has it in for China, these can be had for just a few euros/dollars/pounds.
Indeed many ESP32-base devices you already own may be acting as BLE proxies.So, here’s the board I’m using and here is the ESPHOME code I dropped into it – nothing more than a list of my WiFi access points so I can move the proxy around the house – and the BLE PROXY section (couple of lines of code) – and for the sake of it, a webUI which can be viewed on a browser along with some status information because I hate to waste a good ESP For today’s experiment – I decided I needed some kind of sensor in the webUI to show when the proxy last actually saw something new coming from a nearby BLE device (and what do I mean by nearby – well, that’s all down to the antenna on the proxy and that of the end device.So that required a “last_ble_activity” global variable and an addition to the previously empty esp32_ble_tracker section… and finally a section added under text_sensor called “Last BLE Activity” so the info appears in the WebUI.
Here is my current code for ESP-HOME for the device – dump the code – with suitably amended SSIDs and passwords – I have several routers around the house all with different SSIDs and the same password – into a new ESPHOME project – SAVE then INSTALL on your local PC – attach an ESP32-C3 to a serial port on your PC for the first attempt (should be easy to find the USB port in Windows “device manager” – “USB Ports” – simply plug and unplug the device into a USB port on the PC and watch for changes.All being well after flashing the device serially the first time, any subsequent changes will be do-able over WIFI – the ESP-HOME screen for the device will offer to let you visit the WebUI at the web address of the proxy.substitutions: device_name: ble-proxy-mobile friendly_name: BLE Proxy Mobile device_version: "0.3" esphome: name: ${device_name} friendly_name: ${friendly_name} comment: "Mobile ESPHome Bluetooth Proxy" project: name: "scargill.ble_proxy_mobile" version: "${device_version}" esp32: board: esp32-c3-devkitm-1 framework: type: esp-idf # No logger component: logging disabled api: ota: - platform: esphome wifi: networks: - ssid: !secret wifi_ssid password: !secret wifi_password - ssid: !secret wifi_ssid2 password: !secret wifi_password - ssid: !secret wifi_ssid3 password: !secret wifi_password - ssid: !secret wifi_ssid4 password: !secret wifi_password - ssid: !secret wifi_ssid5 password: !secret wifi_password power_save_mode: none post_connect_roaming: true ap: ssid: "${friendly_name} Fallback" password: !secret wifi_password captive_portal: web_server: port: 80 version: 3 logger: level: NONE globals: - id: last_ble_activity type: uint32_t restore_value: no initial_value: '0' # Wi-Fi information for the Web UI and Home Assistant text_sensor: - platform: template name: "BLE Proxy Capacity" lambda: |- return {"3 connection slots"}; update_interval: 60s entity_category: diagnostic - platform: wifi_info ssid: name: "Connected Wi-Fi" ip_address: name: "IP Address" - platform: template name: "Firmware Version" lambda: |- return {"${device_version}"}; update_interval: 60s entity_category: diagnostic - platform: template name: "Last BLE Activity" lambda: |- if (id(last_ble_activity) == 0) { return {"Never detected"}; } uint32_t elapsed = (millis() - id(last_ble_activity)) / 1000; char buffer[40]; snprintf(buffer, sizeof(buffer), "%u seconds ago", elapsed); return {buffer}; update_interval: 5s entity_category: diagnostic sensor: - platform: wifi_signal name: "Wi-Fi Signal" update_interval: 30s entity_category: diagnostic # Bluetooth configuration esp32_ble: max_connections: 3 esp32_ble_tracker: on_ble_advertise: then: - lambda: |- id(last_ble_activity) = millis(); bluetooth_proxy: active: true connection_slots: 3 And here’s what my proxy WebUI looks like.
All in, not a bad afternoon’s work.Two great new Meross devices checked out – and my knowledge of BLE finally crystal clear.Oh, did I say – the little multi-button unit has a neat display which seems to activate on any kind of movement of the device.
AND there’s a buzzer.As for doing something useful with all of this – I need a break first Above – the MS700 multi-button device from Meross and my “few euros” BLE proxy – nothing else needed (apart from Home Assistant somewhere with the ESPHOME integration – I never go anywhere near the HA device which is hidden in a cupboard in the living room with a UPS – everything is done via my PC in my office – or if I’m out on the road on my Samsung phone thanks to Tailscale VPN).
Read More