Bed leveling is the bane of my existence when it comes to 3D printing, and my old 3D printers made me never want to 3D print.Upgrading my 3D printer to a newer model that had better bed leveling completely changed the game for me, and it will for you, too.Manual bed leveling takes forever to dial in And even when it’s dialed in, it’s not dialed in When I first started 3D printing about four years ago, the 3D printer I had only offered manual bed leveling.
To manually level a bed, you have to dial in four screws at each corner of the bed, and use a piece of paper (or a feeler gauge) to properly set the distance of the nozzle from the bed.It’s a step that can take five minutes or five hours.It all depended on how much your 3D printer wanted to behave.
Mine never wanted to play nice, so I would often spend one or two hours working on it just to get it to an acceptable level.I never did get it fully perfect, and that always frustrated me.Related Everything You Need to Know About 3D Printers 3D printing is becoming more and more mainstream—so is it time to add one to your house? Posts The problem wasn’t my technique; it was with the technique used to actually level the bed.
The bed itself only had four adjustment points, and sometimes the build plate would have some waves in it because of how it was having to pull on the bed.There was no good answer here.I was able to eventually get decent quality prints with manual bed leveling, but one small brush of that oversized bed leveling screw and I was back at square one.
It was truly the most infuriating part of 3D printing for me.Early automatic bed leveling was more "assisted" than "hands-off" I ended up just going back to manual bed leveling Fast-forward a year after I got my first 3D printer and I got a second one—this time with “automatic bed leveling.” There was a probe that would stick out below the print head and push the build plate to figure out how to level it, except it wasn’t truly hands-off.The printer would be able to build a mesh of the bed, but it had no idea how far to offset the Z height to know where to stick the nozzle.
This was because you might mount the external bed level sensor slightly higher or lower than someone else—or it might be mounted slightly higher or lower from the factory.Related 5 uncomfortable truths about 3D printing that you need to hear Even the greatest hobbies have downsides.Posts 5 By Tim Brookes So, to compensate for this, you had to set the Z offset for the printer, and that was something else I had to fight with for hours to get properly dialed in.
Once the Z offset was properly set, you were golden.This was better in some ways than manually leveling the bed, and worse than others.At the end of the day, I would often just give up on automatic bed leveling and go back to manually doing it—at least that was simpler.
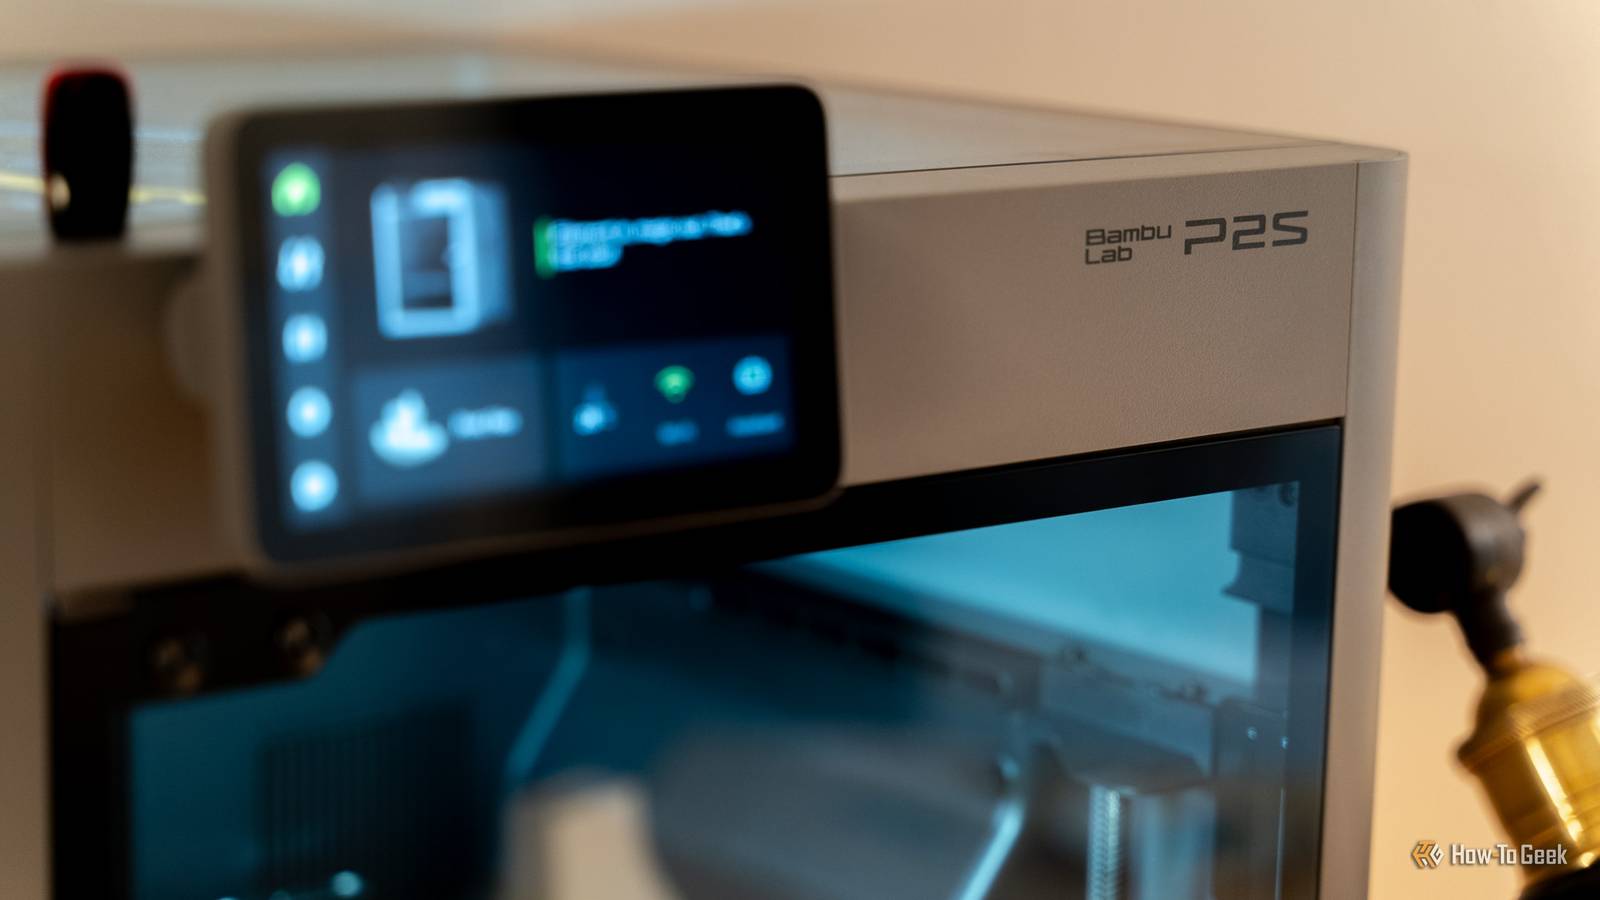
Automatic bed leveling has gotten so good that there's no reason to go back I don’t even think about bed leveling anymore, and it’s glorious About two years ago, I upgraded from my Ender 3 V2 clone printers that I had to the Bambu Lab A1 mini and was instantly blown away.Not only did this printer have automatic bed leveling, but it had auto Z offset and so much more.Once I experienced the features of modern 3D printers, I never wanted to touch the other methods of bed leveling again.
With the Bambu Lab A1 mini (and now my P1S and P2S), 3D printing became more fun for me.I wasn’t worried about “Is the bed level?” or “Will the first layer come out alright?” Now, I can just click print and wait for the project to finish.Related Things you can 3D print at home (but shouldn't) Keep these projects inside of Pandora's box.
Posts 34 By Sydney Butler The crazy part is most modern 3D printers that use the newer bed leveling tech don’t even have the capability of manually leveling a bed.None of my Bambu Lab 3D printers has the old knob-based bed leveling screws on the bottom.This is because the software handles everything now.
How-To Geek Report: Subscribe and never miss what matters Unlock your tech-savvy potential and master the digital world with How-To Geek.Subscribe By subscribing, you agree to receive newsletter and marketing emails, and accept our Terms of Use and Privacy Policy.You can unsubscribe anytime.
Some might see this as a drawback, but after two years of running Bambu Lab printers (and having a close friend who runs a print farm of Bambu Printers) there seems to be zero drawbacks to the newer tech—only benefits.Bambu Lab P2S Build Volume 256x256x256mm Printing Speed 600mm/s The Bambu Labs P2S 3D printer is ready to go out of the box and can have you printing within 15 minutes.It features up to 20-color printing with the AMS unit, has an upgraded built-in camera for remote monitoring and time lapses, and has an enclosed body for printing even high-temperature filament.
$549 at Bambu Lab Expand Collapse Bambu Labs A1 mini 3D Printer Build Volume 180x180x180 Printing Speed 500mm/s The Bambu Lab A1 mini 3D printer is ready to go out of the box and can have you printing within 30 minutes.Offering full-auto calibration, this compact 3D printer features a 180mm build volume and is compatible with the AMS Lite for multi-color printing.It also features built-in vibration and flow-rate calibration, which are typically features only found on more premium printers.
$299 at Bambu Lab Expand Collapse Elegoo Centauri Carbon Build Volume 10.4in x 10.4in x 10.4in Printing Speed 500mm/s The Centauri Carbon is Elegoo's first core XY printer, going up against printers like the Creality K1C, Bambu Lab P1S, and Bambu Lab X1 but at half the price in many cases.This would seem like a joke if the printer itself wasn't so competent and well put together.$299 at Elegoo Expand Collapse If you’re still holding onto that old Ender 3 V2 printer with a manual bed leveling system (or even the pin-based auto bed leveling system), it’s time to upgrade.
Whether you go with Bambu Lab (my personal preference) or a newer Creality, Elegoo, or even Prusa, just get something that has a more reliable system for bed leveling—it’ll make your 3D printing journey easier and more fun.
Read More