Several months ago, I tried using AI to make 3D models and it didn’t end well.When I went to try using AI to make 3D models again, I expected it to end the same way.I was sorely mistaken.
AI-generated 3D models have come a long way in a short amount of time, and it’s now an extremely viable way to create something with your 3D printer that doesn’t exist otherwise.Add How-To Geek on Google Add as Preferred Source Follow on Google Discover I used Meshy’s AI generator to create two completely different types of models and it worked fantastically both times.I was able to go from idea to printing in under 20 minutes for each model, and then it was just all up to the printer to make what I came up with a reality.
Meshy let me fix the picture before it built the model That one step is why both prints worked Close I tried to use AI to make 3D models several months ago and it simply didn’t work all that well.I’ve also tried to convert 2D images into 3D models before and, likewise, that also didn’t work all that well.Things have changed, though, and AI is now very capable of generating 3D models from 2D images, and a 2D image is now actually where most 3D generators start.
I began my AI-powered 3D printing journey using Meshy.ai, one of the more well-known tools for the job.I gave it a prompt and was surprised to find out that it gave me a 2D render first for me to approve.I was able to provide some feedback and tweaks I wanted to see made to the 2D render and really refine it.
One prompt required several revisions before I moved on to 3D generation.The other actually required no revisions.I used both GPT Image 2.6 Flare and GPT Image 2.6 Sunburst models to generate the 2D images and found they both were very comparable to each other for my needs.
Once I settled on a final 2D image for the project, I used Meshy 7.1 to convert it to a 3D model.Close I used a paid plan with Meshy that way I didn’t have to worry about credits, but the projects didn’t actually cost all that much.Each 2D image cost about nine credits per generation which I felt was very reasonable.
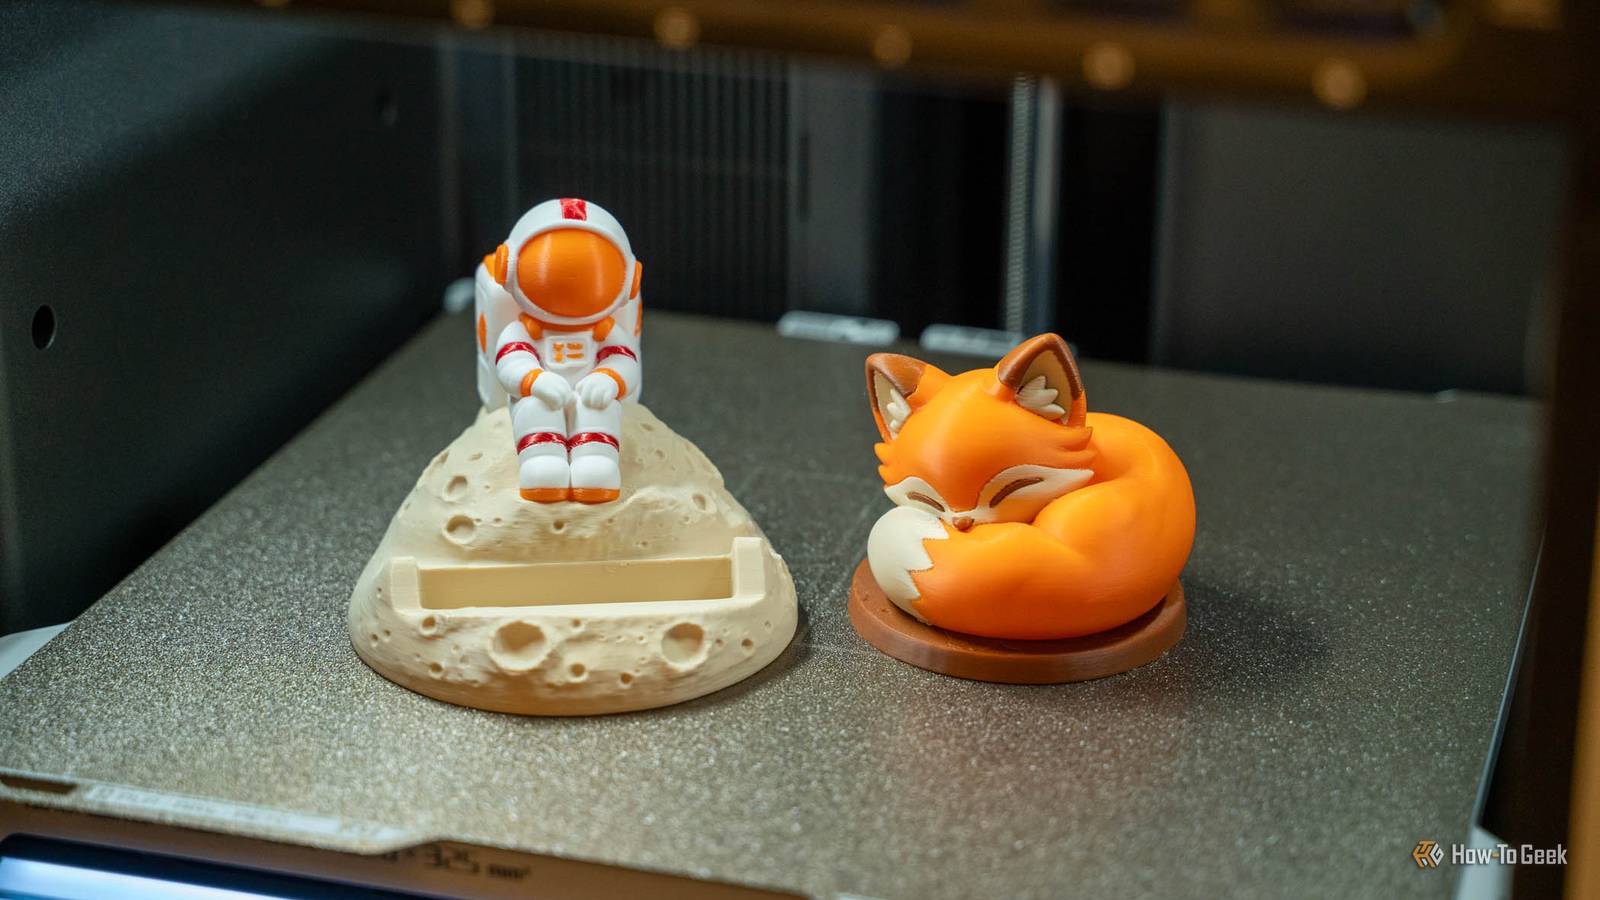
The 3D conversion after that cost between 20 and 30 credits, which I also felt was very reasonable.The fox that I made with Meshy was the one-shot design for me.It was a fairly simple shape and style, and GPT Image 2.6 Flare did a great job with it from the beginning and Meshy 7.1 converted it perfectly.
The astronaut phone holder took a bit more refinement.My initial prompt was probably a bit too specific, and honestly, it stuck to what I typed out.But I didn’t like the result, so I refined it a bit more.
It took me about four revisions to get it to look how I wanted, in one of which I provided about six sample images for it to pull inspiration from.The model came out with four colors and I loaded it up on my Bambu Lab H3C (for faster filament swap with basically no waste) and it was ready-to-print.Both models came out ready for my Bambu Even the paint came along in the 3MF Meshy can provide a file in several different formats.
I chose 3MF as that’s what I work with the most with my Bambu Lab printers and it can carry fine-tuned detail like what printer it’s for and it can even store the painted color information of the model.I opened up both models in Bambu Studio and loved how they were painted already.I remapped the existing colors to the colors I actually had on-hand at the moment and that worked great for me.
I did have to do some manual painting, but that was more to taste and not necessarily the fault of Meshy’s painting.Meshy also runs a “printability check” before it offers the file up for download.I found this check actually to be fairly comprehensive, and Meshy even gave me suggested print settings for my machine in order to have the best success.
On the astronaut model, I wasn’t a fan of how long it was going to take to print, so I asked Meshy for some help there.Related The uncomfortable truth about multi-color 3D printing Print with all the colors of the rainbow (or don't).Posts 5 By Tim Brookes I know, it’s a large multi-color model, but I still didn’t want to wait nine hours for it.
Meshy provided very simple, yet actually accurate instructions for speeding up the print time.I didn’t to ask Meshy how to speed the print up—I already know how to do it myself—but I wanted to see what recommendations it gave.The recommendations were exactly what I had already changed myself and it saved me about two hours of print time.
Essentially, Meshy told me to change the infill percentage, which infill pattern to use, and also to use a larger default layer height with variable layer heights to help retain the detail of the print.I ended up doing everything but the layer height because a 0.24mm default height with variable layer heights came out to be around the same print time as just running 0.20mm layer height for everything.Overall, I was very pleased with the printability check and the overall format of the 3MF file that Meshy was able to produce.
I had to do very little work after importing the files before I actually was able to start the print.The only thing I fixed was the first layer The fox's base floated a few layers above the plate The astronaut phone holder only required two changes from me before it was time to slice and print—a little repainting, and resizing.Meshy had colored the moon base plate of the model with two colors, and I wanted it to just be one color.
That was a preference of mine to save print time and make it a bit simpler.For size, I wanted to make sure it fit my iPhone 17 Pro, so I just drew a primitive cube the size of my iPhone and resized it until it fit.For the fox, I actually had to do a little more than that, though there was only one change it required.
The painting and size of the fox came out perfect—the issue lay in how the base itself was designed.I’m not sure why Meshy’s printability check didn’t catch it, but the base was actually floating.There was one small part that sat on the actual print plate for layer one, and layer two wasn’t much larger.
It wasn’t until layer four that the entire base was printed.So, I just used the cut tool to slice the base at layer four so it would be flat and then printed it from there.This did cause me to have to do a little bit more painting for some reason, but once I had that fixed, the fox printed perfectly without any supports needed.
I did have to enable tree supports for the astronaut, but that’s expected with a model designed the way it was.I'll be using AI for a lot more models now I still prefer to design my own models or find models designed by other people on Printables or MakerWorld, but knowing that AI can actually design pretty solid models now is really nice.AI-generated models used to have random parts that would be left floating and too thin to use supports on, or sometimes not even be complete solids (meaning the printer didn’t know how to handle the model).
But, modern models seem to not be plagued by those issues anymore, and I’m very happy for it.My wife is getting into building with miniatures (things like large-scale dollhouses) and knowing that I can just have Meshy generate a model for whatever she wants if I can’t find it on MakerWorld is really awesome.
Read More