There's nothing quite like a good movie night.A projector and screen combined with a surround sound system give me a taste of the real movie experience, and a bowl of popcorn adds to the impression.What's missing is a movie poster for whatever I'm watching, so I decided to see if I could find a way to make that happen, too.
I wanted to build a "now showing" display for my TV A movie poster for the current content The concept was fairly simple.Some of the apps, services and devices that I use to watch shows and movies have integrations that expose “now playing” data to Home Assistant.For example, using the Jellyfin integration, Home Assistant can see information such as the current play state, the title of the movie, and most importantly for my needs, an entity_picture attribute that exposes the movie poster from Jellyfin.
I wanted to find a way to have this poster image automatically display in my living room when I start watching a movie.For this to happen, I needed a screen to display the image.There were plenty of options, such as wall-mounting a tablet or having the poster show on the tiny screen of my Echo Show 5, but using an entire tablet seemed like overkill, and the Echo Show was far too small.
Home Assistant Green Dimensions (exterior) 4.41"L x 4.41"W x 1.26"H Weight 12 Ounces Home Assistant Green is a pre-built hub directly from the Home Assistant team.It's a plug-and-play solution that comes with everything you need to set up Home Assistant in your home without needing to install the software yourself. $219 at Amazon Expand Collapse An old iPad 2 was sitting unused The glass was cracked but the display was fine I have four old iPad 2 models in a box in my home office.They're too old to be able to run anything useful; I can't even open Home Assistant in Safari, as the browser is so outdated.
Two of the iPads also have cracked screens.I wondered whether it would be possible to rip the display out of one of these iPads, hook it up to a Raspberry Pi, and stick the display into a photo frame.I could then use the iPad display to show the movie poster for whatever I was watching.
A little internet research revealed that this was entirely possible.I could buy a controller board for the iPad 2 display that would allow me to connect it to my Raspberry Pi using an HDMI cable.I could then show whatever I wanted on the display.
The controller board set me back about $15 (although it's more expensive from Amazon), and that was my only expense, as I already had the necessary 12V 3A power supply with 5.5 × 2.1 mm connector in my box of unused tech, along with an HDMI cable.I decided to build the project with my Raspberry Pi 3B+ as a proof of concept; this is also overkill for my needs, but I didn't have a spare mini HDMI to HDMI cable, and the Pi Zero 2 W that I would have used otherwise only has a mini HDMI port.Dismantling the iPad wasn't too horrific; I used a hair dryer to soften the adhesive around the edges and pried the screen off.
I only needed to unclip one connector to extract the display.Hooking it up to the controller board just involved attaching the board’s cable to the display and connecting my Pi to the board using the HDMI cable.Once connected, I powered everything on, and Raspberry Pi OS appeared on the iPad's display.
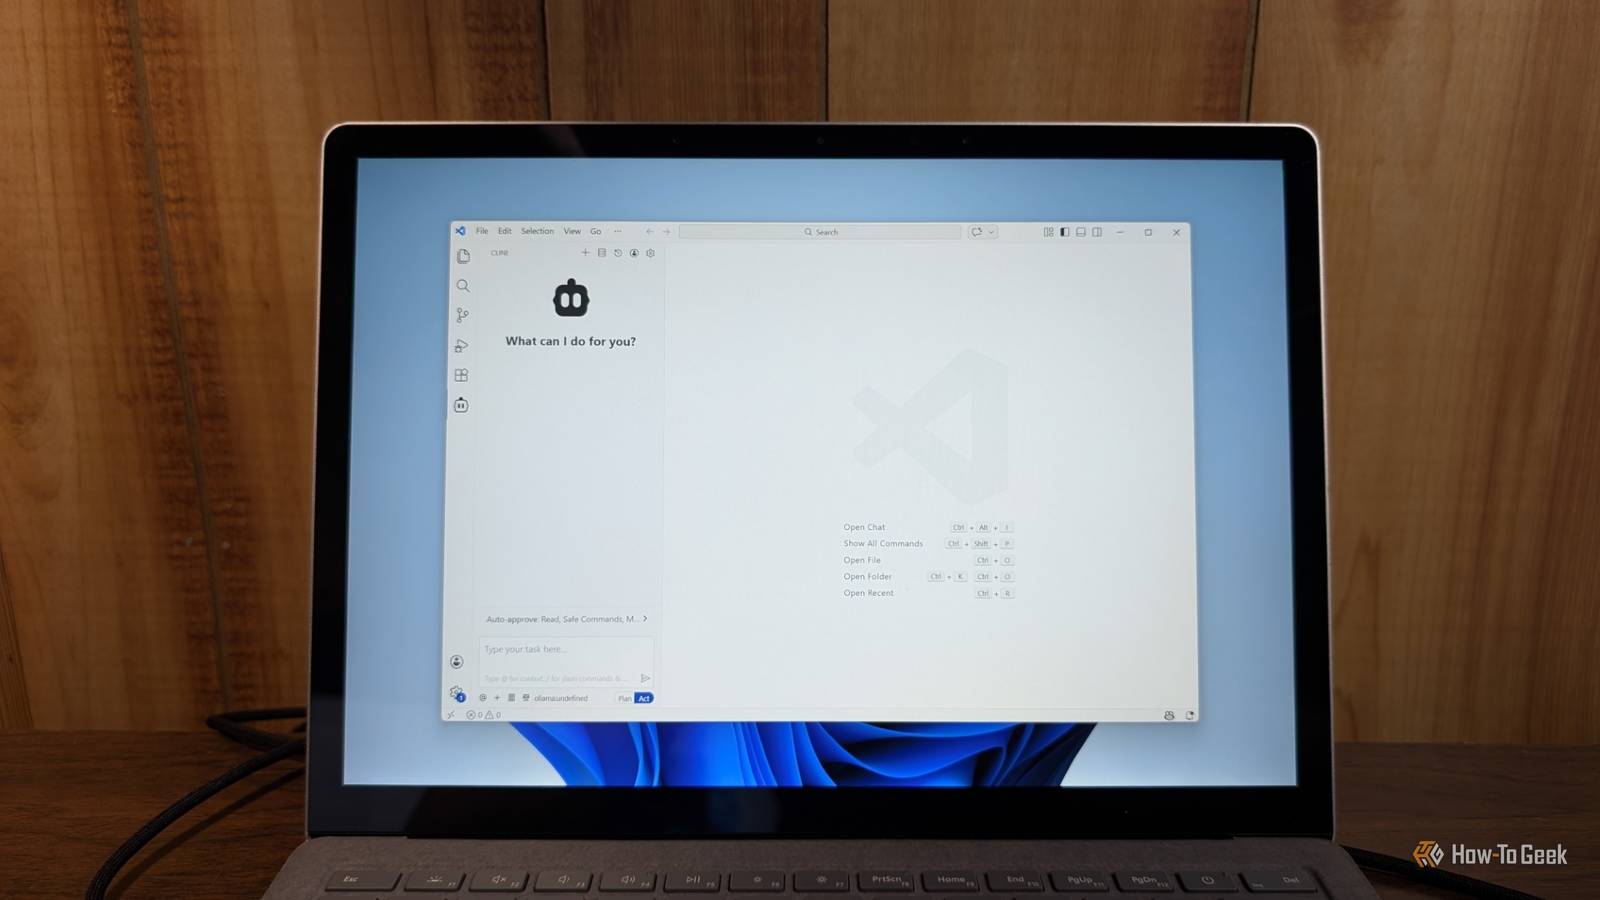
Related 5 Reasons I Use Jellyfin Instead of Plex Jellyfin's price isn't the only thing going for it.Posts 29 By Tim Brookes Displaying the current content on the screen Jellyfin and Sky Q exposed what I needed The next phase was to get the display to show the poster for the current movie.The Jellyfin integration in Home Assistant already gave me a link to the image I needed, so I just needed a way to get this image to display on the screen.
I tried a few different methods to get this to work, including running Chromium in kiosk mode, using a framebuffer image viewer command-line tool, and using Pygame, but these methods were either unnecessarily heavy, gave me scaling issues, or were unreliable when called from a background service.In the end, I opted to convert the image into raw pixel data and write it directly to the Linux framebuffer.There was no need for a desktop environment, browser, or display server just to show the image.
This method gave me a beautiful image on the iPad display without any scaling issues, and it was more than fast enough for an image that only needs to update when I start or stop a movie or TV show.As well as getting now playing information from Jellyfin, I was able to pull it from my Sky Q set-top box too, so I could create a now playing image when watching live TV channels.An automation detects when Jellyfin or Sky Q starts playing and uses a REST command to send an HTTP POST request to a Flask server running on the Raspberry Pi, with a payload containing the poster image URL.
The Pi downloads the image and processes it to suit the display.The artwork is resized while preserving its aspect ratio, placed onto a custom canvas, given a blurred background to fill any unused screen space, and rotated to match the portrait orientation of the display.The final image is then converted into RGB565 format, the 16-bit pixel format used by the framebuffer.
The raw data is written to /dev/fb0, which updates the screen to display the converted poster image.The upshot is that I get beautiful movie poster artwork on the iPad's display whenever I start a show or movie in Jellyfin or watch something on my Sky Q box.Repurposing my iPad feels great I've been wanting to find a genuinely useful way to repurpose my old iPads for a long time, and this is a great way to do so.
My next steps are to have the screen display family photos when I'm not watching TV, and to display the current PS5 game I'm playing when I'm gaming.At around $40 for a Pi Zero 2 W and the iPad display controller board, I'm definitely going to rip the screens out of my other old iPads fairly soon.
Read More