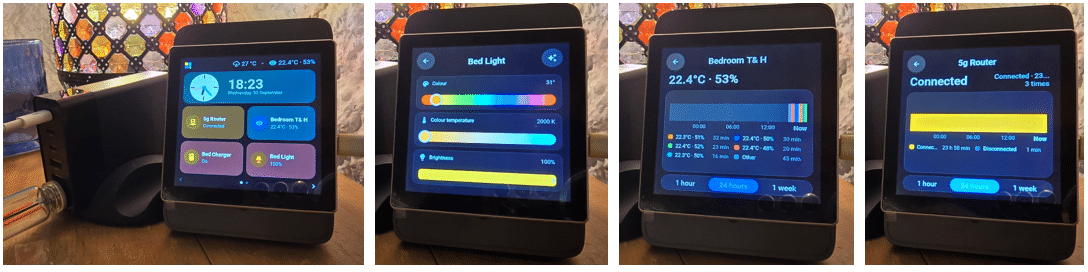
I’ve been experimenting with the Guition ESP32-S3-4848S040, a 4-inch 480 × 480 capacitive touchscreen based on the ESP32-S3, with 16 MB flash and 8 MB PSRAM.It’s a surprisingly capable little Home Assistant display.The first firmware I installed was EspControl, making a nice ESPHome-based smart-home control panel.
The Guition 4848S040 is one of the boards specifically supported by EspControl (up to 10″ – but the 4″ is sub-30 euros – it just increased from 25 Euros (AliExpress) this week).It worked, and I could control Home Assistant devices from the screen – and compared to my Tasmota-modified Sonoff NSPanel (original) way better and easier, but I wanted something rather more flexible.We’ll leave the NSPanel Pro out of this as it is Android and NOT easy to mod.
I have now (as of this morning) moved the same hardware to Tessera, the new name for ESP Screens, by Max Gramser.It provides a drag-and-drop interface for building Home Assistant touchscreen pages without having to write the display configuration in YAML.The project supports both CYD and Guition ESP32 panels.
And I have to say, I rather like it.This morning I’d not touched Tessera – by lunchtime I had a working display with one page and a couple of working panels – by tonight – it’s in my bedroom at the bedside cabinet replacing the Sonoff NSPanel and achieving far, far more already.The Guition becomes a proper little Home Assistant control panel, with tiles for lights, switches, sensors, weather and other entities straight out of Home Assistant.
The current firmware supports multiple pages and, in the latest releases, considerably more than the original 3 × 3 arrangement.One particularly useful trick I’ve discovered is to create combined Home Assistant template sensors.For example, rather than using separate tiles for temperature and humidity (you only have max 9 tiles per page), I created one entity which displays: 21.4°C · 48% That gives me considerably more information without wasting a tile.
I’ve also used a simple template entity whose state is just “-“ as a spacer — a surprisingly effective way of getting a little more breathing room between items on the screen.The next stage was to put the display into a Sonoff NSPanel Pro enclosure.I’m currently still using USB power but looking to power the Guition internally from a small isolated 230 V → 5 V supply, using the board’s internal power connection (8 way connector – not the 3v7 battery connector) rather than having a USB cable hanging out of the side (present situation).
There is/was also a Wi-Fi wrinkle to sort out, as different parts of the house use different access points.The good news is that the Tessera author has confirmed that multiple Wi-Fi networks and firmware updates are supported, so that should be straightforward.This is very much work in progress, but so far the combination of the inexpensive Guition hardware and Tessera software looks extremely promising.
My first board is now running by the bedside, the second one will also be in a desktop box in my office, the third when it arrives will sit on a white wall junction box cover provided I can find room inside the junction box for a tiny sealed 5v supply.Note that in the above, given a working Home Assistant setup – there is no coding involved in getting this display up from scratch.See the current pages (dark scheme) in the lead photo for this article.
Read More