The TV is by far the biggest screen in my home.I have smaller screens all around the house that I use to display useful information, but the 49-inch screen in the living room is mostly going to waste.I decided to build a custom TV dashboard that could be displayed on the TV when we weren't watching anything.
I built a dashboard that works from across the room Each screen was designed to be readable on my TV The beauty of a giant screen is that it's visible even from the furthest points of the room.An Echo Show 5 can display useful information if you're sitting in front of it, but if it's too far away, you can't see what it says.With my TV, I knew that I could make the dashboard elements large enough that they'd be easy to read no matter where we were in the room.
This meant that I couldn't just display my standard Home Assistant dashboard; I needed to build a custom dashboard that would take advantage of the large screen size.My plan was to add information such as the local weather, our home calendar, presence detection, a notification system, and more.We'd then be able to use the TV to keep track of all of this information just by glancing at the TV.
Raspberry Pi 5 Brand Raspberry Pi Storage 8GB It's only recommended for tech-savvy users, but the Raspberry Pi 5 is a tinkerer's dream.Cheap, highly customizable, and with great onboard specs, it's a solid base for your next mini PC.CPU Cortex A7 Memory 8GB Operating System Raspbian Ports 4 USB-A $199 at Amazon $175 at CanaKit Expand Collapse A Raspberry Pi was all I needed to keep it running It boots to a dedicated Home Assistant dashboard I didn't need any complicated hardware to set up my custom TV dashboard.
Since I already have Home Assistant running in my homelab, all of the dashboards themselves could be created and hosted there.I just needed a way to display those dashboards on the TV.A Raspberry Pi was an obvious choice.
I had an old Raspberry Pi 3B+ to hand, which was a perfect fit, since it has a full-size HDMI port.The Raspberry Pi 4 and Raspberry Pi 5 have micro-HDMI ports, and while I have plenty of standard HDMI cables in my boxes of tech junk, finding a micro-HDMI cable would have been far more of a challenge.I flashed a microSD card with Raspberry Pi OS with Desktop, which includes the Chromium browser.
With a script, I could point the browser at the correct URL for my custom dashboard in Home Assistant.I also added instructions to launch Chromium in full-screen kiosk mode when the Raspberry Pi starts and to relaunch Chromium if it crashes.I hooked up the Raspberry Pi to the TV.
It booted up, launched Chromium, but then I hit the Home Assistant sign-in screen.I used VNC to display the Pi's desktop on my Mac and entered the credentials, which Chromium then saved so that I wouldn't need to enter them again.Once the sign-in was completed, the dashboard opened.
My custom TV dashboard was visible on my smart TV.Related Stop overlooking the biggest smart home device you own The clue is in the name.Posts By Adam Davidson Rotating dashboards made the best use of the large display Multiple screens are better than a single dashboard trying to show too much Close I see many posts on Home Assistant forums where people share images of the dashboards that they've designed.
A lot of these designs cram a crazy amount of stuff onto a single screen, making it difficult to find anything on the huge wall of information.This is not what I wanted for my dashboard.A single dashboard that was packed with information would mean that the information would be far too small to be read from the other side of the room.
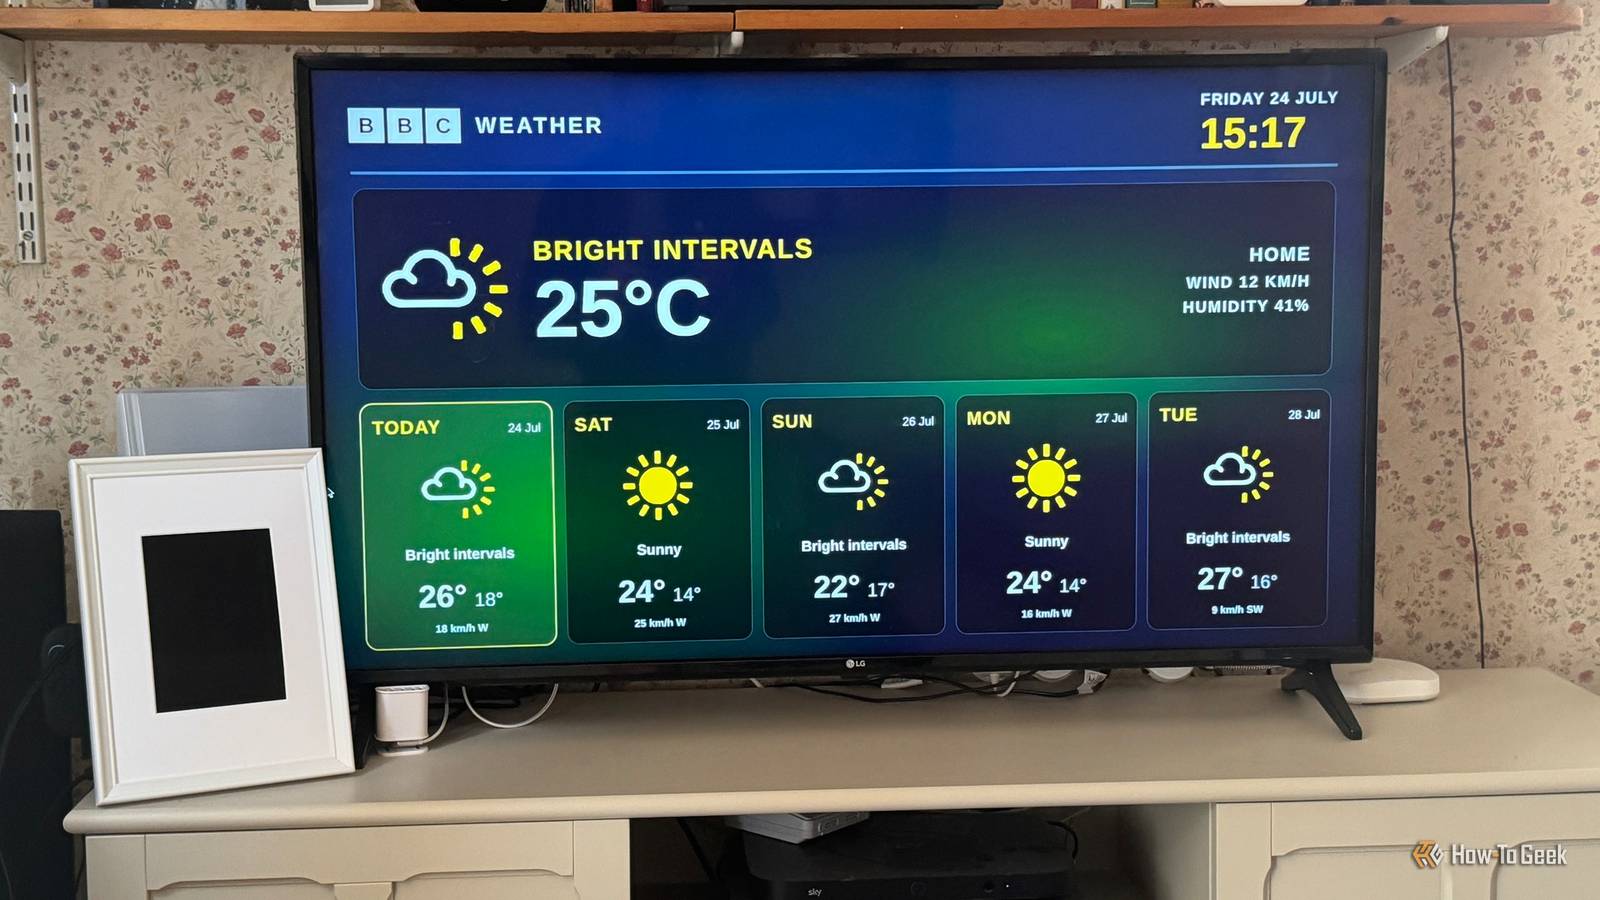
What I wanted was a clean dashboard with large text that could be read from anywhere.The problem was that it would limit the information I could display.I could make a weather dashboard that was large enough to read, but that would use up all the screen real estate, and I wouldn't be able to display all the other information I wanted to include.
The solution was to have the TV rotate through several different dashboards, each with its own information.That way I could get across a lot of information without having to fit it all onto a single screen.I created a single dashboard containing a custom carousel that rotates through six different dashboard screens.
Only two screens are loaded at a time: the current screen and the next screen to be displayed.This minimizes the load on the Pi's 1 GB of RAM but still allows the next screen to load smoothly without interruption. The dashboard is tailored to my home Every page is information that we care about The result is exactly what I wanted.I have an automation set up that switches to the HDMI input for the dashboard when neither the smart TV apps nor the DVR has been playing anything for more than 30 minutes.
The dashboards continue to rotate until I power off the TV.If I want to watch TV or use a streaming app, I just switch to the relevant HDMI input, and the dashboard keeps running in the background.Since it's running on a Raspberry Pi, the power draw isn't huge, so I just leave it running.
It's always ready to be viewed when we need it.It's so much better than having to stare at the ads and promotions on my smart TV's home screen or having a useful screen just sitting idle all day.By using custom dashboards, we get to see exactly the information that we want, and it's simple to change up the dashboards whenever necessary by editing them in Home Assistant.
My TV is now useful for more than just Netflix Using my TV as a dashboard has been really useful.As well as displaying helpful information, the dashboard includes a split-flap-style display that I can use to show notifications.If the washing machine finishes, for example, this information can be sent as a notification to the dashboard.
Plus, it's made our TV far more useful.
Read More