Have you noticed small vertical lines on your 3D prints that look a bit like scars? These are seams, and they’re an inescapable part of extrusion-based 3D printing methods.Let’s take a look at what’s going on and what you can do about it.What are seams? An inescapable part of 3D printing Fused deposition modeling (FDM) 3D printers build objects line-by-line.
This is a stop-start process, where the head will move around the print bed, dumping filament wherever it needs to in order to get the job done.Where one line starts and stops, a seam is formed.Let’s say your 3D printer needs to complete one line that runs right around the edge of a square object.
Since these lines cannot overlap, a small gap will appear between the point at which the line starts and stops.If enough of these lines stop and start in the same place, the effect becomes more pronounced and forms a seam.Some objects are more prone to this than others.
Most slicers do a decent job of hiding these at discreet points, like in the corners of a print.Sometimes, changes can be made to the model to put the seams in less obvious places.Occasionally, neither of these things happens, and seams can be one big, ugly surprise.
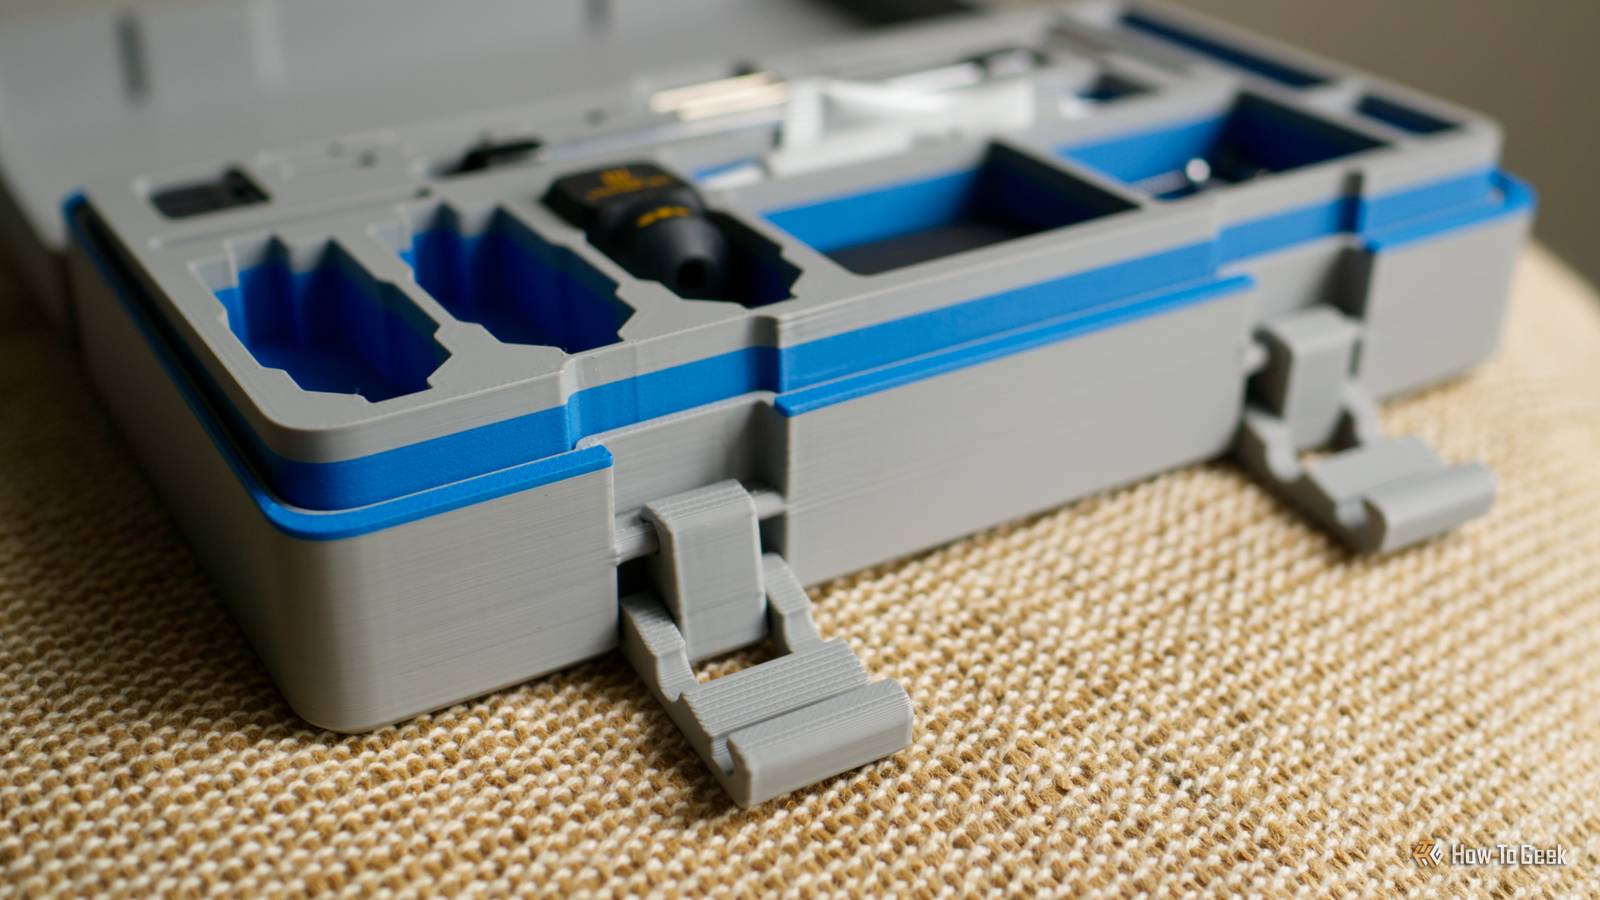
For example, take this toolbox that I printed to store tools and spare parts.On the back of the object are some very obvious seams: You might be wondering why the seams don’t go all the way down, and seem to only appear in sporadic places.If we turn the toolbox around, you’ll see why: The position of the hinges means that the rest of the seams are hidden by opportune 90º angles.
You really have to hunt for them to see them.Every slicer has to contend with seams for every FDM print.Thankfully, there are a few things you can do to understand where these seams will appear and even potentially better position them.
Preview seam locations before you print The seams behind the scenes Most slicers will show you the position of seams before you commit to a print, which happens after slicing but before the job has been sent to the printer.In Bambu Studio, OrcaSlicer, and Prusa Slicer (which are all open-source projects that can be traced back to Slic3r), hit “Slice” on a model and then take a look at the “Slicing Result” pop-up that appears.Make sure that “Filament” is selected in the drop-down.
You should now see, in addition to print time and filament estimates, some checkboxes at the bottom of the window.Click the one next to “Seams” and take another look at your model.Seams will now appear as white lines.
Unfortunately, it’s not always possible to see every seam location.For example, in the sliced preview of the aforementioned toolbox, the seams at the rear of the model are obscured by another part of the model: If you don’t like where the seams are positioned, you can either make changes to the print settings or add them manually.Change where the seams appear on your model Automatically or manually Your first option for changing how seams appear on your model is to modify the print settings.
I’m using Bambu Studio for this, but the process should be largely similar for other slicers.Head back to the “Prepare” stage of your print.On the “Quality” tab, you’ll find a “Seam” section.
Use the drop-down box to select a position from options like: Nearest: This setting is ideal for models with sharp corners, but will also choose to optimize for the print head traveling path rather than alignment.Aligned: Like “Nearest” except with a preference for aligning non-sharp edges so that seams appear in a vertical line rather than sporadically throughout the print.Back: Places the seams at the back of the model.
Use the 3D cube in the bottom left of the corner to see what constitutes the “front” and “back” to align the print to suit.Random: A completely random approach to prevent seam grouping, with the downside of having small imperfections all over the model.Make changes and then hit “Slice” again to preview where your seams now appear.
If you’re still not happy, there’s one more slicer tool that you probably shouldn’t ignore: seam painting.Head back to the “Prepare” stage in the slicer and then find the “Seam painting” tool in the slicer’s toolbar.This is how it appears in Bambu Studio.
You can now manually paint lines onto your model where you want the seams to be.You can lock your brush to paint only vertical lines if you want.Bambu Lab P2S Build Volume 256x256x256mm Printing Speed 600mm/s The Bambu Labs P2S 3D printer is ready to go out of the box and can have you printing within 15 minutes.
It features up to 20-color printing with the AMS unit, has an upgraded built-in camera for remote monitoring and time lapses, and has an enclosed body for printing even high-temperature filament.$549 at Bambu Lab $549 at bhphotovideo $550 at Micro Center Expand Collapse ELEGOO Centauri Carbon 2 Build Volume 256 × 256 × 256 mm Connectivity Wi-Fi The ELEGOO Centauri Carbon 2 builds on the solid foundation of its predecessor and adds an affordable, effective multicolor system to the mix.$449 at Amazon Expand Collapse Seams are a small price to pay for the magic of 3D printing.
Looking for even more ways to improve your prints? Check out these slicer defaults you might want to change.
Read More