If you're using Windows Terminal for WSL or Powershell, there are some features from Linux terminals that you might miss.Fortunately, it's easier to customize Windows Terminal than ever.Here are some tweaks that can make it behave more like Linux terminals.
Tabbed terminals Switch between sessions One feature that I've missed from Linux terminal emulators is the use of tabbed terminals.The idea is similar to browser tabs.I tend to prefer to have one browser tab for something like editing, and another for running commands, or reading a manual page.
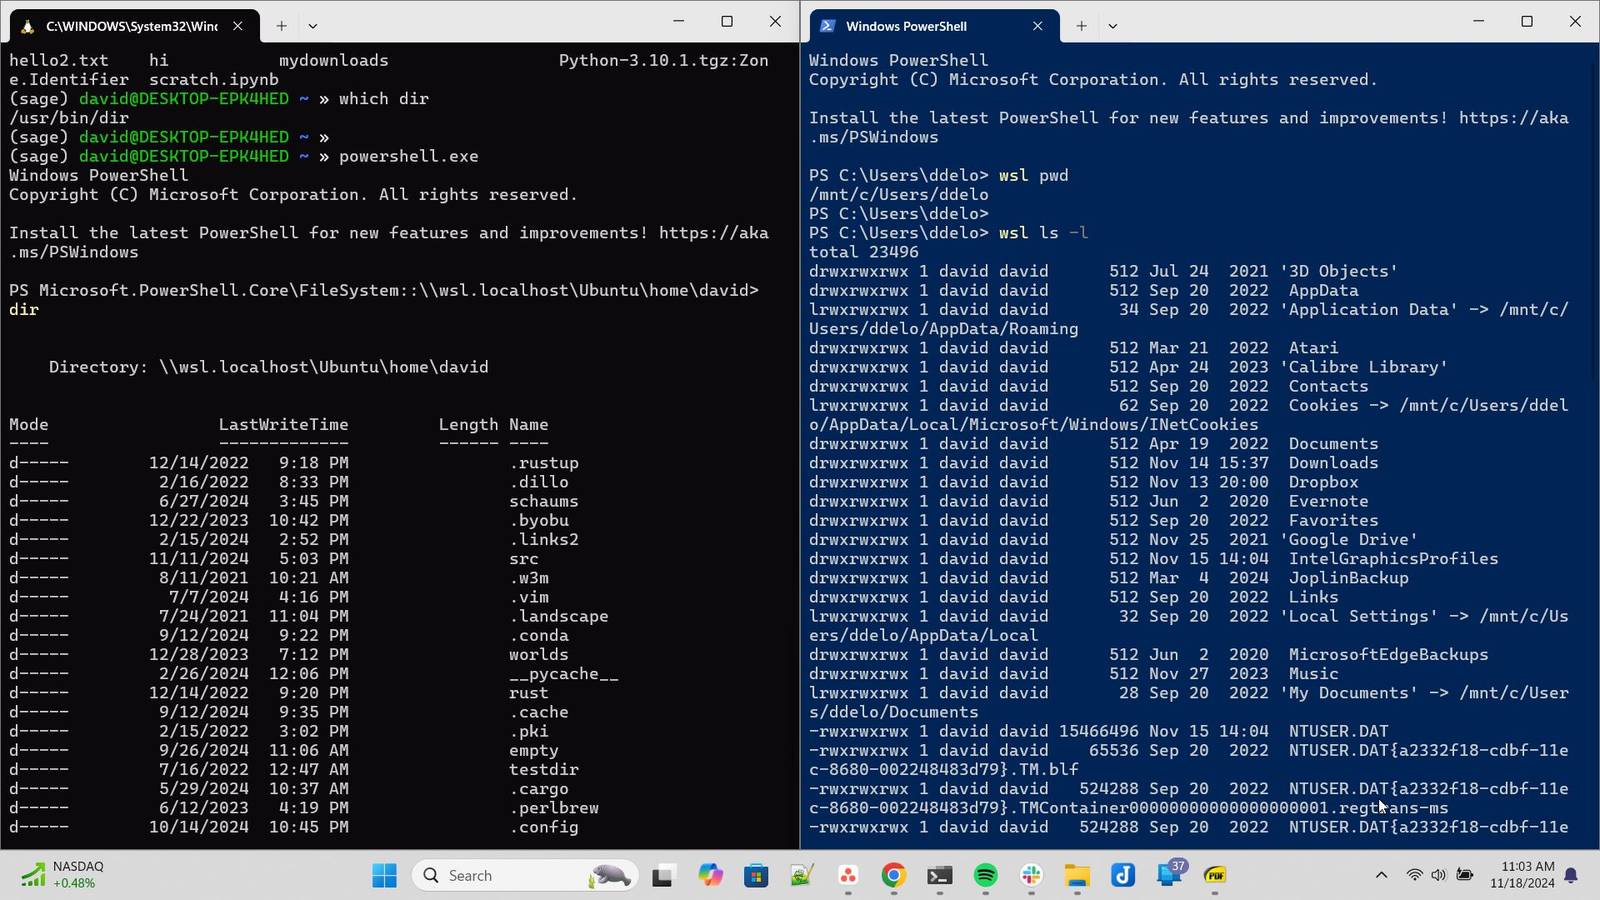
Browser tabs in Windows Terminal work similarly to tabs in other terminal emulators.You can create a new tab by clicking the + (plus) icon or pressing Ctrl + Shift + T.This will create a new tab with the default profile.
You can create a new window by holding down Shift and clicking the + icon.Holding down Alt while pressing the + button will split the current window vertically, similar to a terminal multiplexer.Unlike a terminal multiplexer, you can't detach windows and have them come back up.
If you close them, they'll go away, so be sure to save your work in one.You can drag off existing tabs into a new window and drag tabs back into them.Themes Make Windows Terminal look how you want When I started learning about the command line on MS-DOS, there was only the gray-on-black scheme.
As with Linux terminal emulators, you can choose a default style for the profile you want to use.When using Ubuntu under WSL, I prefer the white-on-purple to match the default theme for Ubuntu terminals.When I dip into PowerShell, I go for the white-on-blue theme.
I can change this in Windows Terminals settings menu.I'll go to Settings and then click on the profile I want to modify.Suppose I want to change how Ubuntu looks.
I'll click Settings > Ubuntu > Appearance under Profiles.To change the theme, I'll select "Color Scheme" and choose from the drop-down menu.Transparency and background images Follow along with tutorials or just spruce up your terminal In the 2000s, it seemed that transparent terminals were all the rage in the Linux world.
It looked cool, and it proved you had a compatible video card and had managed to install the right driver.You could pretend you were a hacker in a '90s movie.While these terminals are useful for hacking the planet, they also serve a practical purpose.
It's easier to follow along with tutorials on the internet by letting you position the terminal over your browser window.To access the transparency setting, access the same profile settings for the profile you want to adjust.The transparency will be under "Transparency" and will read "Background transparency.
" The slider is set to 100%.You can move it down to adjust your preferred transparency level.To have it take effect, click the "Save" button.
To get a blurred background, toggle the "Enable acrylic material" switch.This makes it less useful for seeing what's below your terminal.You can also set a background image using this menu.
Go to Background image and type in a path to an image you want to use or click Browse to open Windows Explorer and navigate to the image.Backward search with Ctrl+R Easily remember what you did before A handy feature in the Linux terminal is to use Ctrl + R to search backward in the terminal.This is a shell feature rather than a terminal feature.
It's my preferred way to access my history.Both Bash and zsh, the latter of which is my shell of choice, have it bound by default.It's under command-line-editing.
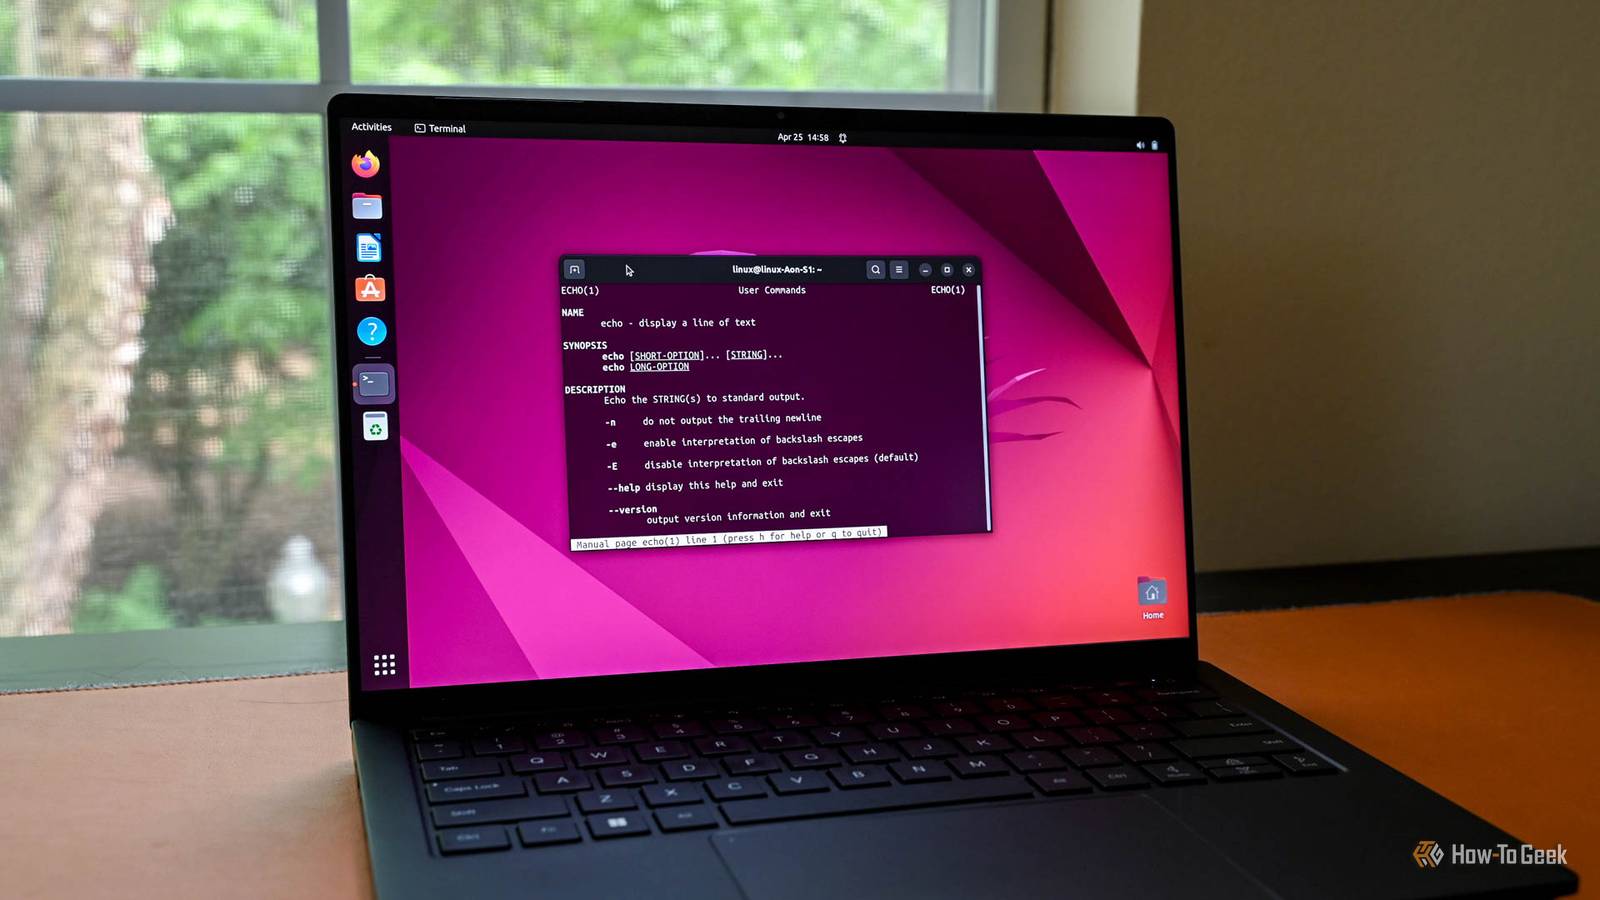
On zsh under Ubuntu, I'll press Ctrl + R and the prompt will change to bck-i-search, which stands for backward interactive search.I was also surprised to find it in PowerShell.I'll press Ctrl + R and will see the same bck-i-search.
Have the pane focus follow the mouse An old-school focus method is still available on Windows Terminal Early X Window systems on Unix workstations handled mouse focus different than modern desktop systems do.Many were set to have the focus follow the mouse cursor.This is known as "focus-follows-mouse." When you hover the mouse over a window, you'll be able to interact with it.
When the cursor is outside of the window, nothing will happen if you type into it.A lot of people who started using Unix systems in the '80s and '90s prefer it, as well as power users.They claim it's more productive, but I wonder how much it might be inertia.
Because this is such a popular option among expert users, you can enable it in Windows Terminal.Go to the Settings menu, then click Interaction.Toggle the "Automatically focus pane on mouse hover." Click "Save" at the bottom to make the change take effect This will only work in the spilt window mode mentioned earlier.
To split the window, click the + (plus) button in the menu bar while holding the Alt key.You'll have two terminal windows.With this mode, all you have to do to type in the terminal pane is move the mouse cursor over it.
Otherwise, you'd have to click inside it.Many more Windows terminal tweaks available Windows Terminal is one of the best-kept secrets for technical Windows users.Whether you use WSL or PowerShell, there are a lot more customization efforts.
Windows 11 Pro $29.99 $199 Save $169.01 Get Windows 11 Pro and elevate your PC experience while it's available at a huge 88% discount. $29.99 at StackSocial Expand Collapse
Read More