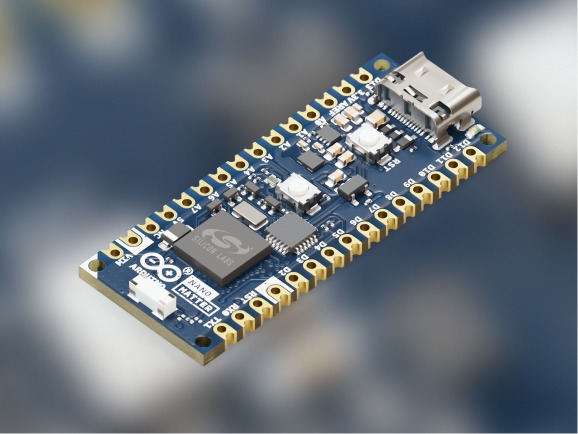
Pick Zigbee from a menu in the Arduino IDE, upload an example, and your board joins the smart home network that bulbs, sensors, and switches already share.The Arduino Nano Matter board has always been about the low-power side of the smart home.Until now, your sketches had two ways into the smart home: Matter over Thread and Bluetooth LE wireless technology, both on its Silicon Labs MGM240S module.
On September 15th a third arrived: update the Arduino core for Silicon Labs to 5.0, and your sketches can speak Zigbee too.It lives where the other two already are.Open Tools › Protocol stack, choose Zigbee, and the sketch you upload is compiled with the Zigbee 3.0 stack instead.
Same board, same IDE, a different stack.Start with a project Before any datasheets, here is what it looks like when it all comes together.The Zigbee Smart Clock is a desk clock built on Nano Matter, an Arduino Modulino Thermo, a Modulino Light, and a 32×8 LED matrix.
It was developed alongside the new library, as a real-world test of what the library can do.Once it joins your network, Home Assistant receives its temperature, humidity, and light readings and can switch the display on or off.The clock asks the network for the current time, so you never set it by hand, and it dims or brightens itself to suit the room.
The full build (wiring, the 3D-printable base and the code) is on Arduino Project Hub.Your first Zigbee device, in one screen of code The new Zigbee library wraps Silicon Labs’ EmberZNet stack in Arduino-style classes.A sensor is an object: give the device a name, call begin(), and report values.
Here is a trimmed zigbee_temp_sensor: Put your Zigbee coordinator in pairing mode and upload.Joining can take a few minutes, depending on your network.The Serial Monitor tells you where the board landed: Home Assistant’s ZHA integration picks it up like any other Zigbee device: The paired network is stored in the board’s non-volatile memory, so after a reset or a new upload the board is still part of it.
What’s in the box 14 ready-to-run examples cover 11 device types.Lights come as on/off, dimmable and color bulbs, plus an on/off plug-in unit.One switch type sends on/off and dimming commands.
Sensors report temperature, humidity and light level, and a contact sensor tells you whether a door, window or drawer is open.Two helpers round it out: a power-source reporter and a time client that asks the network for the current time.Devices join as a router (the default, relaying traffic for the mesh) or as an end device.
Two features stand out: Direct control with bindings: once a switch is bound to a light, the switch controls the light directly, without waiting for a hub automation.For the library’s own switch, you create the binding once in Home Assistant ZHA.The light and plug-in classes can also act as a Find-and-Bind target: call start_find_and_bind() (for example on a button press, as the library documentation shows), and Zigbee remotes that support Find-and-Bind can bind to them without the hub setting up the binding.
Identify: when your hub sends an Identify request, the library tells your sketch, so it can blink an LED; the zigbee_lightbulb_identify example does exactly that.Handy when five identical boards are sitting on your desk.One honest caveat: out of the box, the humidity and light level examples send made-up values, and the temperature example measures the MG24 chip itself, not the room.
Read a real sensor instead (a Modulino Thermo, for example) and a few changed lines make them real.Both ends of the network A Zigbee home network is built around a coordinator, the radio that forms the network and lets devices join.Commercial hubs do this job, and the Zigbee section of the Nano Matter user manual names several that work with the board: Amazon Echo and SmartThings models, Hubitat Elevation (C-8), the IKEA DIRIGERA hub, and Home Assistant with a Zigbee radio.
The coordinator can also be another Nano Matter.The core includes prebuilt Zigbee EZSP coordinator firmware (since version 4.0), and a Python script in the core turns a board into the Zigbee radio for Home Assistant’s ZHA integration.Open a terminal in the core’s extra/firmware folder (on macOS: ~/Library/Arduino15/packages/SiliconLabs/hardware/silabs/5.0.0/extra/firmware; on Windows: %LOCALAPPDATA%\Arduino15\packages\SiliconLabs\hardware\silabs\5.0.0\extra\firmware, where the command is py instead of python3; on Linux: ~/.arduino15/packages/SiliconLabs/hardware/silabs/5.0.0/extra/firmware) and run: Python 3 is required.
With no arguments, the script prints the boards it supports.Plug that board into the machine running Home Assistant (a Raspberry Pi works well), add it in ZHA as the Zigbee radio, and build the lights, switches and sensors with your other boards.Every radio in the network is then an Arduino-programmable board.
To turn the coordinator back into a device, run Tools › Burn Bootloader with Tools › Programmer set to OpenOCD (this erases the coordinator firmware and its network), then upload a Zigbee sketch.Ideas to try this weekend A door-left-open alert: the contact sensor example with a reed switch on a spare pin, and a Home Assistant automation that pings you.A real room sensor: the temperature example with a Modulino Thermo, reporting to Home Assistant.
A desk lamp and its switch: two boards running the dimmable light and on/off switch examples, bound once in Home Assistant ZHA, so the switch board’s button toggles the lamp directly.A clock that sets itself: the time client example is the core of the Smart Clock above.A board that grows with you The protocol menu is only one of the ways Nano Matter grows.
Zigbee now sits next to Matter over Thread and Bluetooth LE.One stack runs per sketch, so you switch by picking another and uploading again.When a project needs more than the common device types (a custom cluster, an unusual device, a different endpoint layout), the same hardware runs Silicon Labs’ full Zigbee SDK in Simplicity Studio.
For Bluetooth LE projects, Nano Matter can also run native Zephyr.Get started 1.Open Boards Manager in the Arduino IDE, search for Silicon Labs and install version 5.0.0.
2.Choose Nano Matter as the board and set Tools › Protocol stack to Zigbee.New board, or switching over from Matter or BLE? Set Tools › Programmer to OpenOCD and run Tools › Burn Bootloader once.
It erases the board, including any saved network.3.Open File › Examples › Zigbee, pick an example and upload.
4.Put your coordinator in pairing mode and watch the board join.The Zigbee section of the Nano Matter user manual walks through each step, and the library documentation covers every class.
The core is open source, and issues and pull requests are welcome on GitHub.What will you build with it? Share it on Project Hub.
Read More